Difference between revisions of "List of Highest International Bridges/Page 11"
From HighestBridges.com
Jump to navigationJump to search| Line 6: | Line 6: | ||
|- | |- | ||
| [[Image:XiaoshawanHuangheOpen2013.jpg|100px|link=Huanghe Bridge Xiaoshawan]] | | [[Image:XiaoshawanHuangheOpen2013.jpg|100px|link=Huanghe Bridge Xiaoshawan]] | ||
| − | | {{sort| | + | | {{sort|1147|1147}} |
| [[Huanghe Bridge Xiaoshawan]]<br />小沙湾黄河大桥 | | [[Huanghe Bridge Xiaoshawan]]<br />小沙湾黄河大桥 | ||
| {{ft to m|(377)|abbr=yes|precision=0}} | | {{ft to m|(377)|abbr=yes|precision=0}} | ||
| Line 15: | Line 15: | ||
|- | |- | ||
| [[Image:Jialingjiang Bridge Guanyinxia.jpg|100px|link=Jialingjiang Bridge Guanyinxia]] | | [[Image:Jialingjiang Bridge Guanyinxia.jpg|100px|link=Jialingjiang Bridge Guanyinxia]] | ||
| − | | {{sort| | + | | {{sort|1148|1148}} |
| [[Jialingjiang Bridge Guanyinxia]]<br />观音峡嘉陵江特大桥 | | [[Jialingjiang Bridge Guanyinxia]]<br />观音峡嘉陵江特大桥 | ||
| {{ft to m|(377)|abbr=yes|precision=0}} | | {{ft to m|(377)|abbr=yes|precision=0}} | ||
| Line 24: | Line 24: | ||
|- | |- | ||
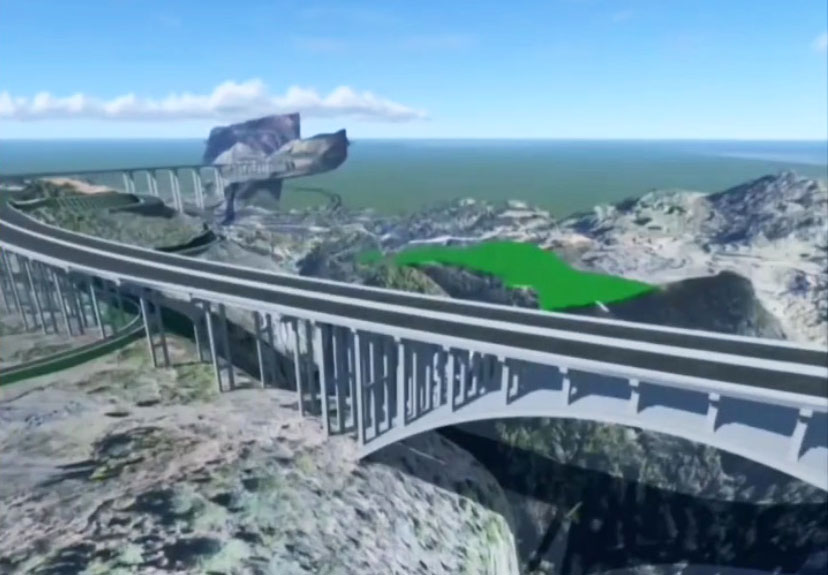
| [[Image:Dongting River Yuanshui Render.jpg|100px|link=Dongting River Yuanshui Bridge]] | | [[Image:Dongting River Yuanshui Render.jpg|100px|link=Dongting River Yuanshui Bridge]] | ||
| − | | {{sort| | + | | {{sort|1149|1149}} |
| [[Dongting River Yuanshui Bridge]]<br />洞庭溪沅水特大桥 | | [[Dongting River Yuanshui Bridge]]<br />洞庭溪沅水特大桥 | ||
| {{ft to m|(377)|abbr=yes|precision=0}} | | {{ft to m|(377)|abbr=yes|precision=0}} | ||
| Line 33: | Line 33: | ||
|- | |- | ||
| [[Image:MaituwanRailway.jpg|100px|link=Maituwan Railway Bridge]] | | [[Image:MaituwanRailway.jpg|100px|link=Maituwan Railway Bridge]] | ||
| − | | {{sort| | + | | {{sort|1150|1150}} |
| [[Maituwan Railway Bridge]]<br />麦土湾双线特大桥 | | [[Maituwan Railway Bridge]]<br />麦土湾双线特大桥 | ||
| {{ft to m|(377)|abbr=yes|precision=0}} | | {{ft to m|(377)|abbr=yes|precision=0}} | ||
| Line 42: | Line 42: | ||
|- | |- | ||
| [[Image:Luohe Bridge Liangmucun.jpg|100px|link=Luohe Bridge Liangmucun]] | | [[Image:Luohe Bridge Liangmucun.jpg|100px|link=Luohe Bridge Liangmucun]] | ||
| − | | {{sort| | + | | {{sort|1151|1151}} |
| [[Luohe Bridge Liangmucun]]<br />良木村洛河特大桥 | | [[Luohe Bridge Liangmucun]]<br />良木村洛河特大桥 | ||
| {{ft to m|(377)|abbr=yes|precision=0}} | | {{ft to m|(377)|abbr=yes|precision=0}} | ||
| Line 51: | Line 51: | ||
|- | |- | ||
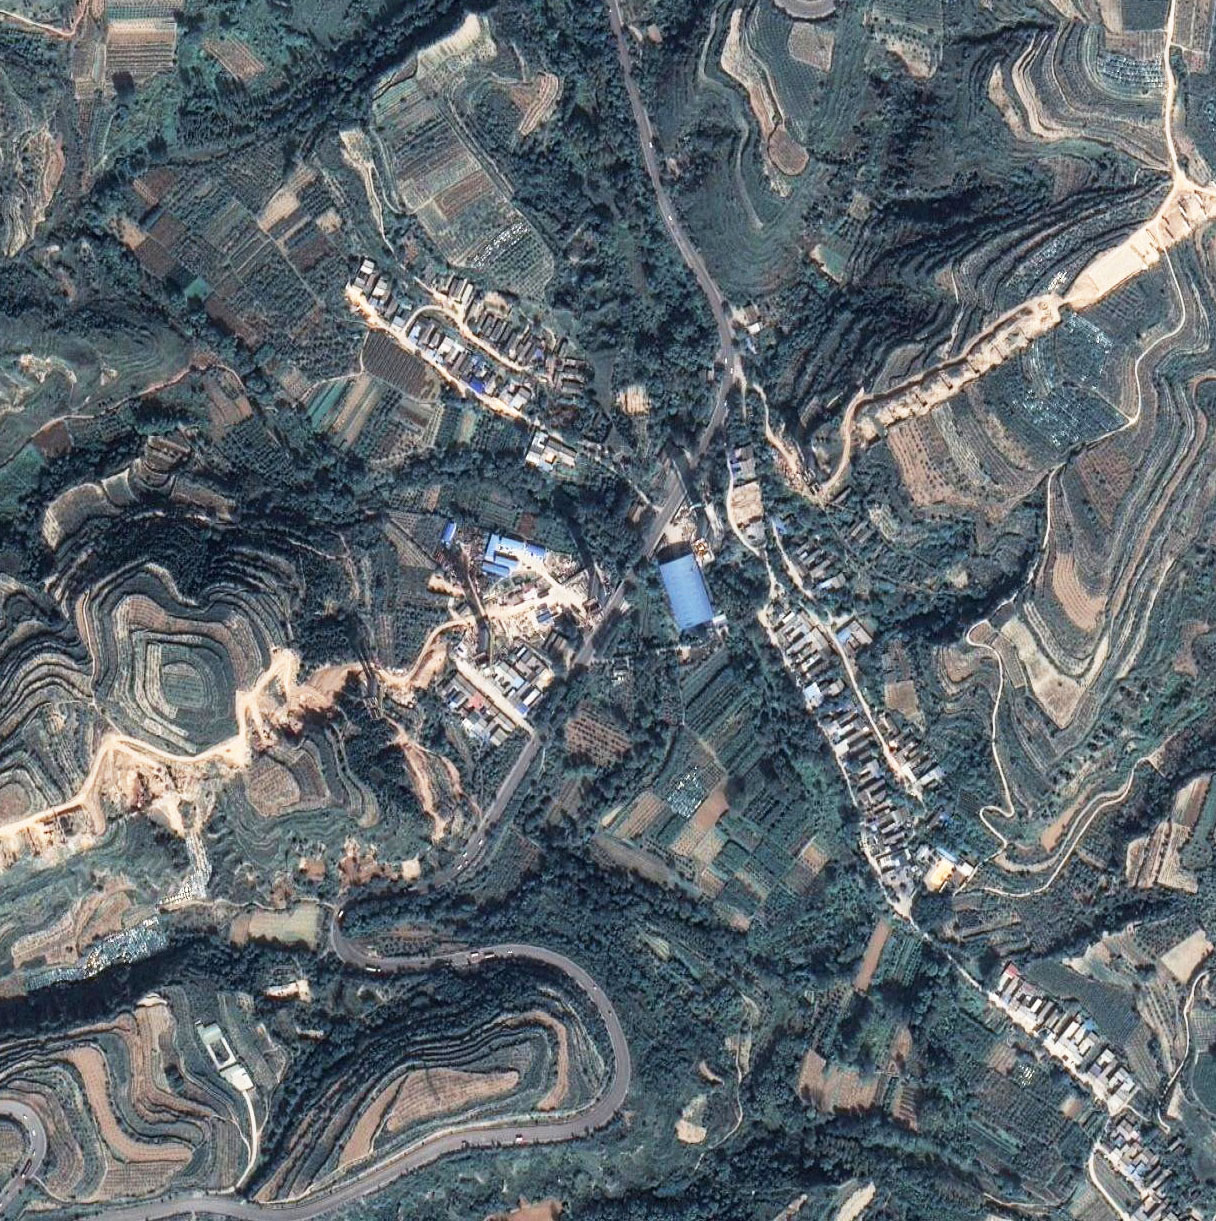
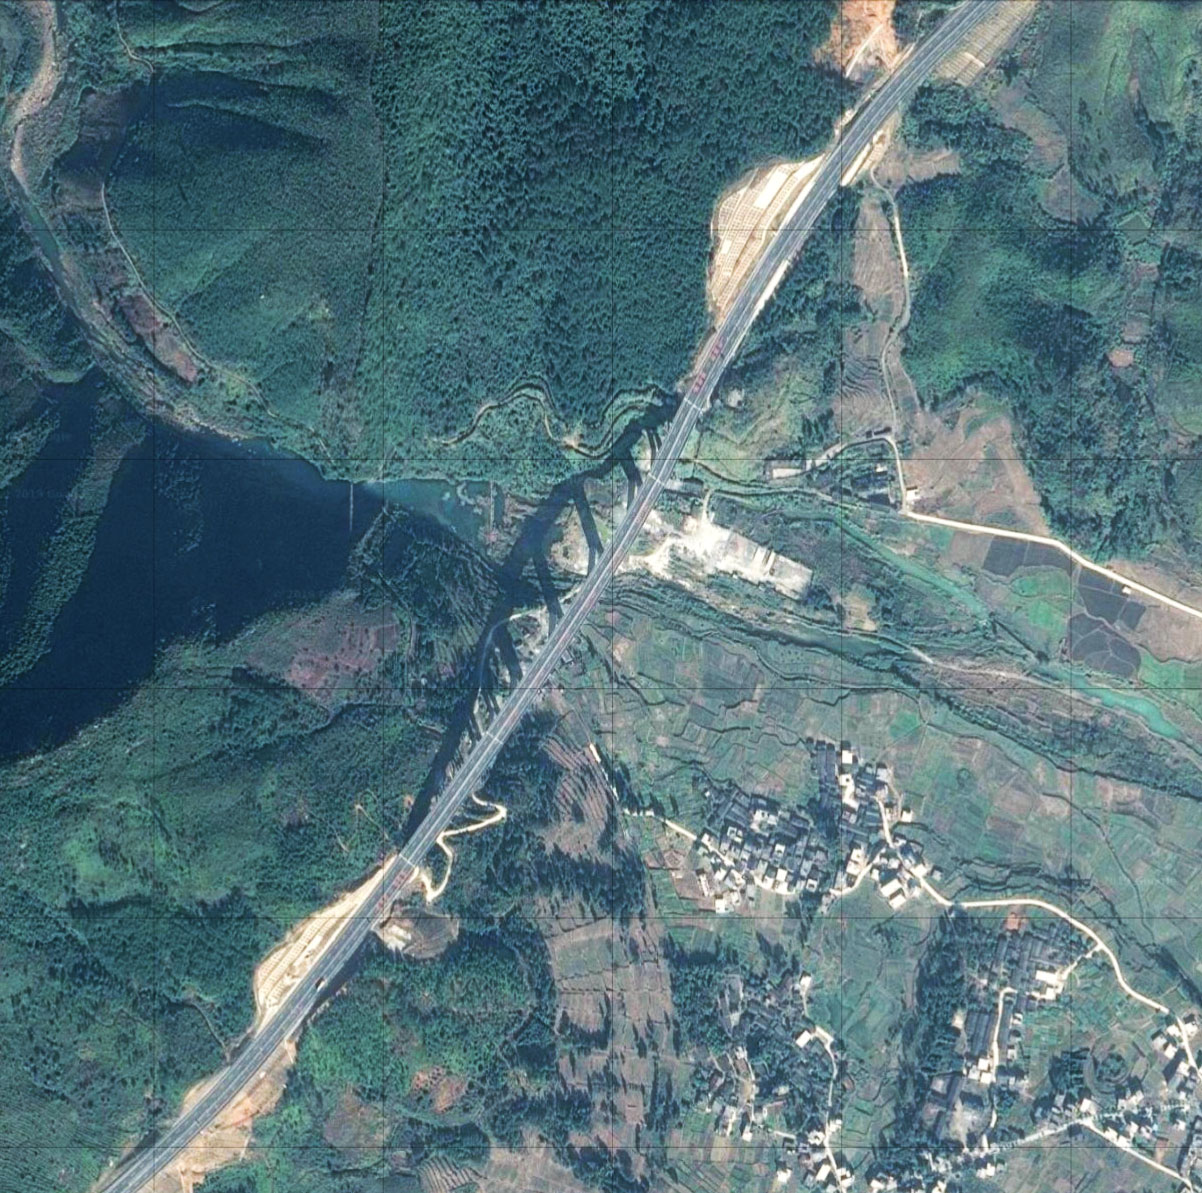
| [[Image:DajianjiaoSatellite.jpg|100px|link=Dajianjiao Bridge]] | | [[Image:DajianjiaoSatellite.jpg|100px|link=Dajianjiao Bridge]] | ||
| − | | {{sort| | + | | {{sort|1152|1152}} |
| [[Dajianjiao Bridge]]<br />大见角大桥 | | [[Dajianjiao Bridge]]<br />大见角大桥 | ||
| {{ft to m|377|abbr=yes|precision=0}} | | {{ft to m|377|abbr=yes|precision=0}} | ||
| Line 60: | Line 60: | ||
|- | |- | ||
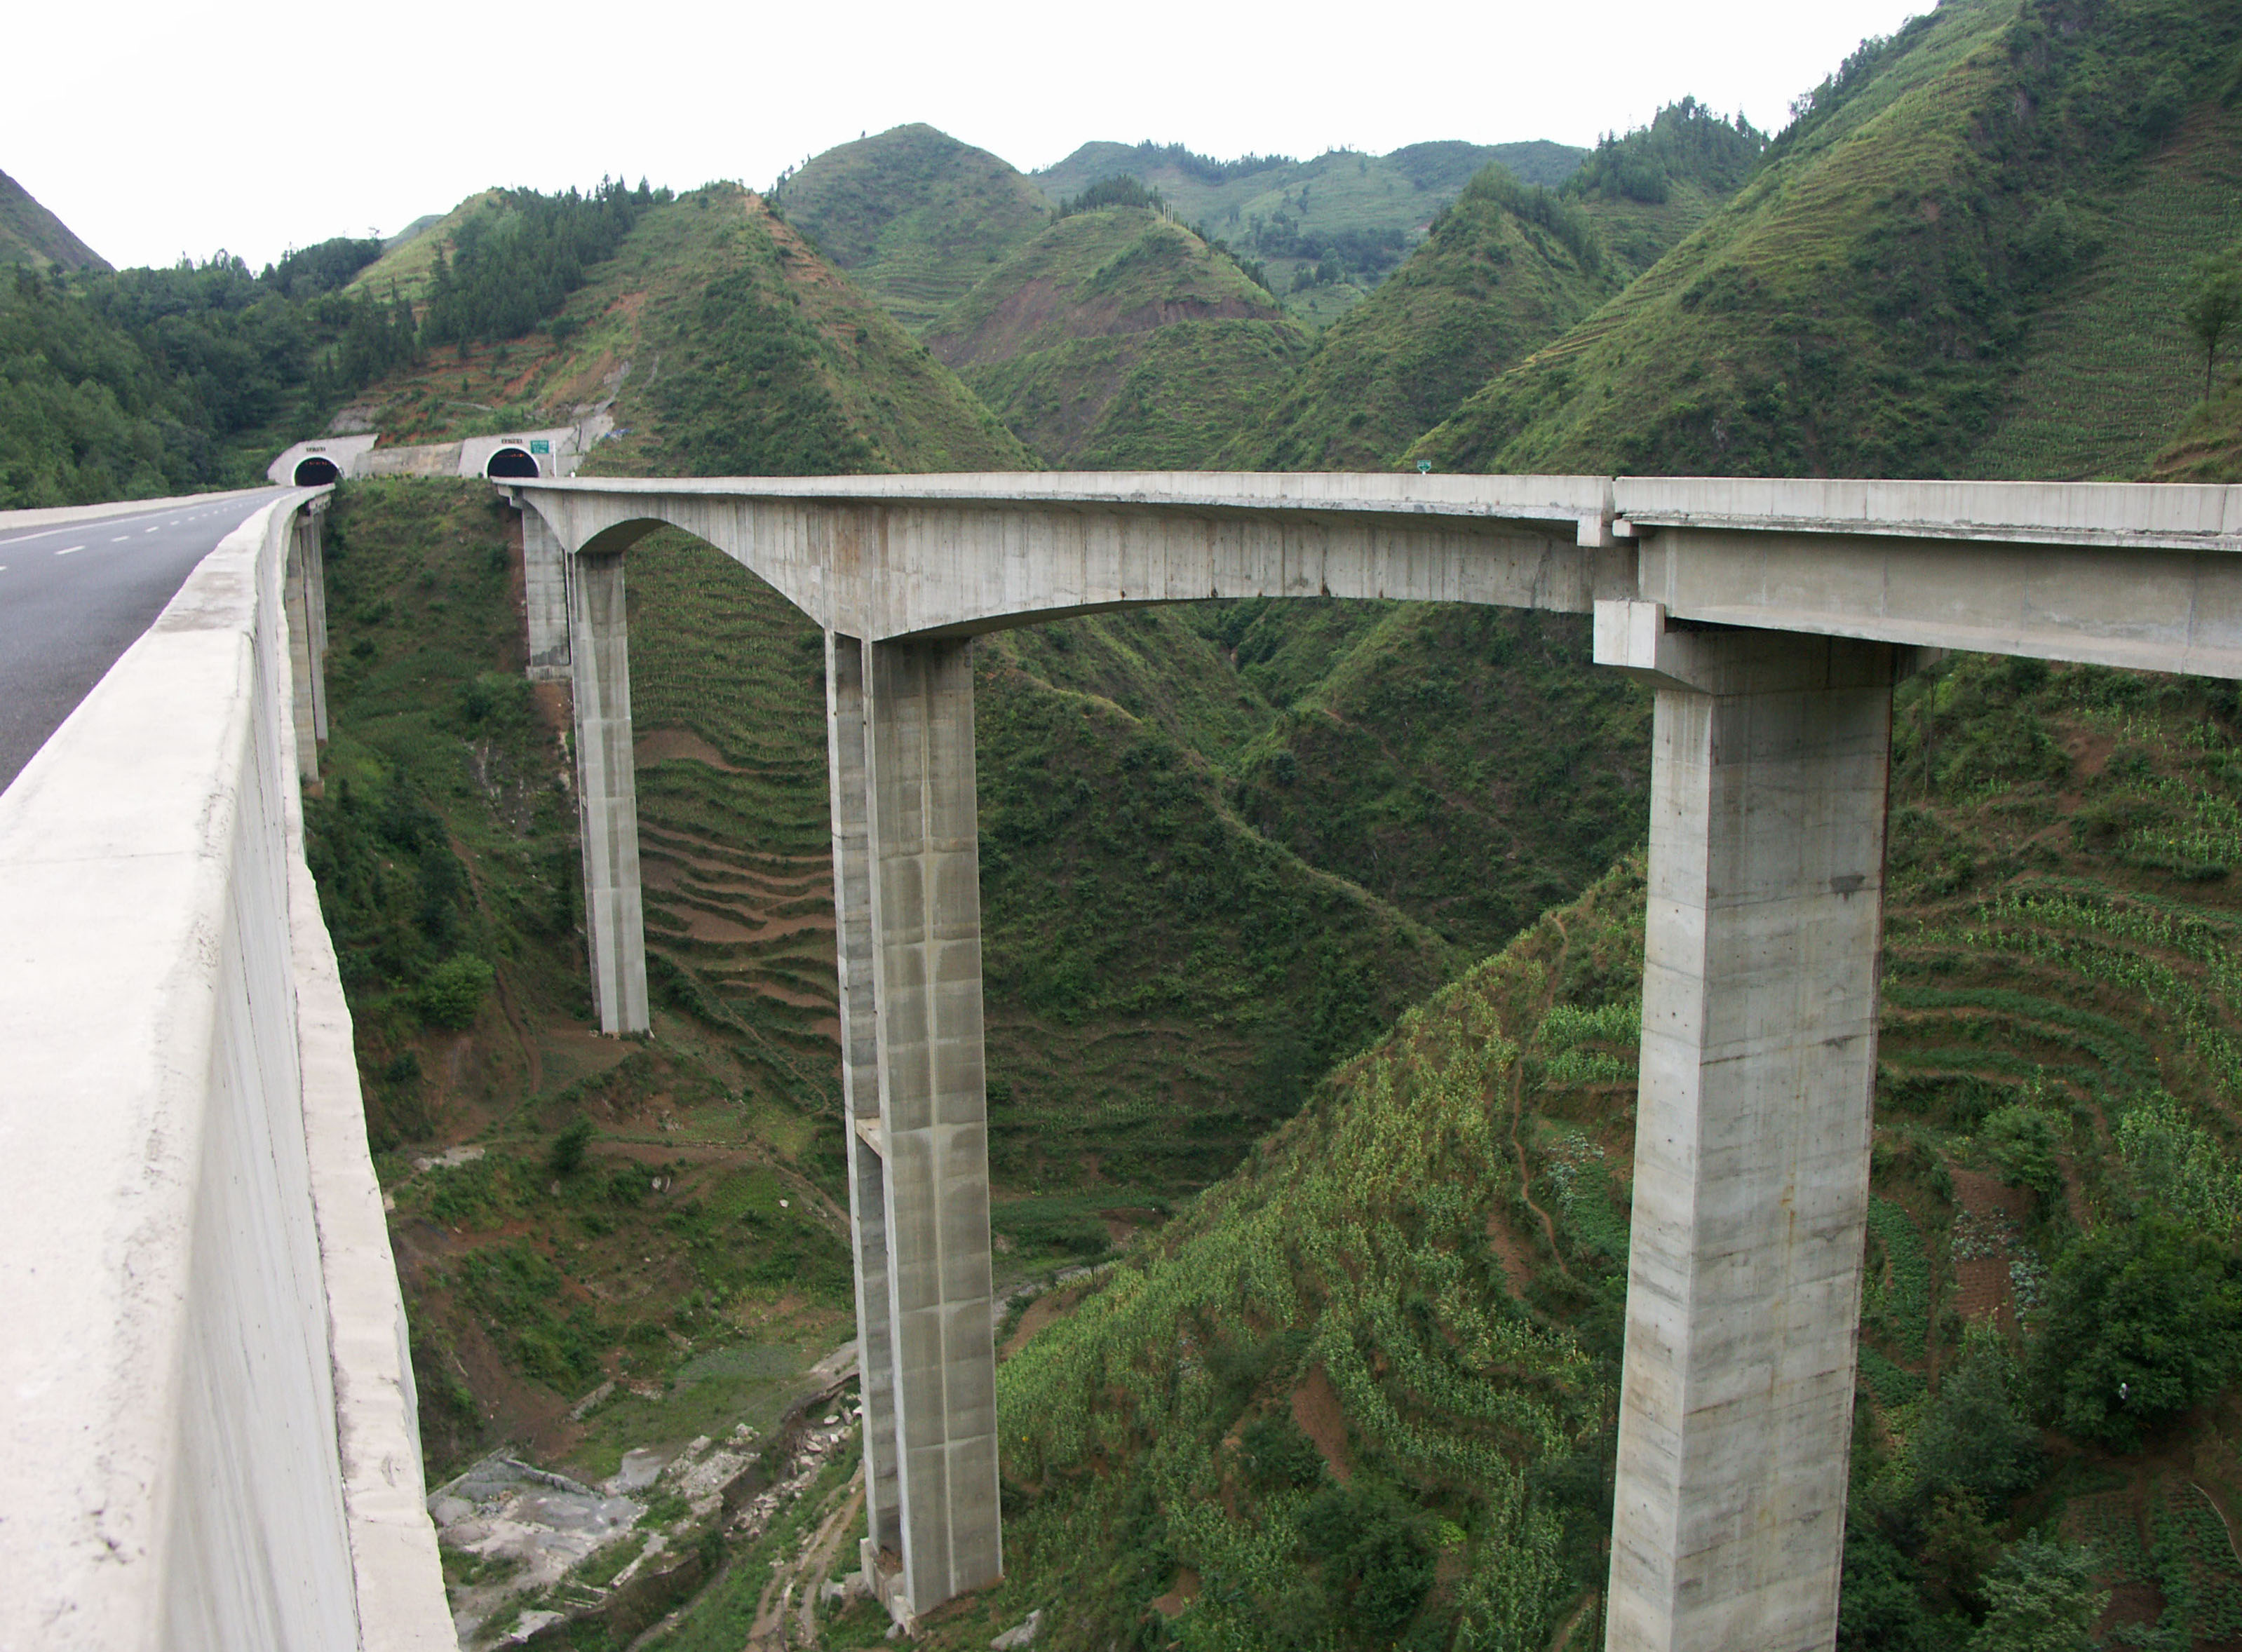
| [[Image:HeimugouDrone.jpg|100px|link=Heimugou Bridge]] | | [[Image:HeimugouDrone.jpg|100px|link=Heimugou Bridge]] | ||
| − | | {{sort| | + | | {{sort|1153|1153}} |
| [[Heimugou Bridge]]<br />洛川黑木沟大桥 | | [[Heimugou Bridge]]<br />洛川黑木沟大桥 | ||
| {{ft to m|(377)|abbr=yes|precision=0}} | | {{ft to m|(377)|abbr=yes|precision=0}} | ||
| Line 69: | Line 69: | ||
|- | |- | ||
| [[Image:DayuheView.jpg|100px|link=Dayuhe Bridge]] | | [[Image:DayuheView.jpg|100px|link=Dayuhe Bridge]] | ||
| − | | {{sort| | + | | {{sort|1154|1154}} |
| [[Dayuhe Bridge]]<br />大浴河特大桥 | | [[Dayuhe Bridge]]<br />大浴河特大桥 | ||
| {{ft to m|(377)|abbr=yes|precision=0}} | | {{ft to m|(377)|abbr=yes|precision=0}} | ||
| Line 78: | Line 78: | ||
|- | |- | ||
| [[Image:Xushuihe Bridge HetongSatellite.jpg|100px|link=Xushuihe Bridge Hetong]] | | [[Image:Xushuihe Bridge HetongSatellite.jpg|100px|link=Xushuihe Bridge Hetong]] | ||
| − | | {{sort| | + | | {{sort|1155|1155}} |
| [[Xushuihe Bridge Hetong]]<br />合铜高速徐水沟特大桥 | | [[Xushuihe Bridge Hetong]]<br />合铜高速徐水沟特大桥 | ||
| {{ft to m|(377)|abbr=yes|precision=0}} | | {{ft to m|(377)|abbr=yes|precision=0}} | ||
| Line 87: | Line 87: | ||
|- | |- | ||
| [[Image:Jianxi Piers.jpg|100px|link=Jianxi Bridge]] | | [[Image:Jianxi Piers.jpg|100px|link=Jianxi Bridge]] | ||
| − | | {{sort| | + | | {{sort|1156|1156}} |
| [[Jianxi Bridge]]<br />涧西大桥 | | [[Jianxi Bridge]]<br />涧西大桥 | ||
| {{ft to m|(377)|abbr=yes|precision=0}} | | {{ft to m|(377)|abbr=yes|precision=0}} | ||
| Line 96: | Line 96: | ||
|- | |- | ||
| [[Image:Sishang5.png|100px|link=Sishang Bridge]] | | [[Image:Sishang5.png|100px|link=Sishang Bridge]] | ||
| − | | {{sort| | + | | {{sort|1157|1157}} |
| [[Sishang Bridge]]<br />寺上大桥 | | [[Sishang Bridge]]<br />寺上大桥 | ||
| {{ft to m|(377)|abbr=yes|precision=0}} | | {{ft to m|(377)|abbr=yes|precision=0}} | ||
| Line 105: | Line 105: | ||
|- | |- | ||
| [[Image:Qiaomalinchang-1BridgeFromBelow.jpg|100px|link=Qiaomalinchang #1 Bridge]] | | [[Image:Qiaomalinchang-1BridgeFromBelow.jpg|100px|link=Qiaomalinchang #1 Bridge]] | ||
| − | | {{sort| | + | | {{sort|1158|1158}} |
| [[Qiaomalinchang #1 Bridge]]<br />巧马林场1号大桥 | | [[Qiaomalinchang #1 Bridge]]<br />巧马林场1号大桥 | ||
| {{ft to m|377|abbr=yes|precision=0}} | | {{ft to m|377|abbr=yes|precision=0}} | ||
| Line 114: | Line 114: | ||
|- | |- | ||
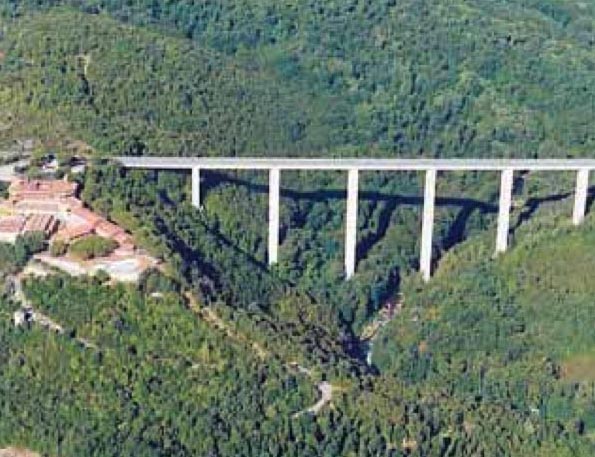
| [[Image:Viadotto SoriColorautostrada A12.jpg|100px|link=Sori Bridge]] | | [[Image:Viadotto SoriColorautostrada A12.jpg|100px|link=Sori Bridge]] | ||
| − | | {{sort| | + | | {{sort|1159|1159}} |
| [[Sori Bridge]]<br />Ponte Sori | | [[Sori Bridge]]<br />Ponte Sori | ||
| {{ft to m|377|abbr=yes|precision=0}} | | {{ft to m|377|abbr=yes|precision=0}} | ||
| Line 123: | Line 123: | ||
|- | |- | ||
| [[Image:ColomberSideCompletion.jpg|100px|link=Vajont Bridge]] | | [[Image:ColomberSideCompletion.jpg|100px|link=Vajont Bridge]] | ||
| − | | {{sort| | + | | {{sort|1160|1160}} |
| [[Vajont Bridge]]<br />Ponte Vajont | | [[Vajont Bridge]]<br />Ponte Vajont | ||
| {{ft to m|377|abbr=yes|precision=0}} | | {{ft to m|377|abbr=yes|precision=0}} | ||
| Line 132: | Line 132: | ||
|- | |- | ||
| [[Image:1RicobayoArch.jpg|80px|link=Ricobayo Viaduct]] | | [[Image:1RicobayoArch.jpg|80px|link=Ricobayo Viaduct]] | ||
| − | | {{sort| | + | | {{sort|1161|1161}} |
| [[Ricobayo Viaduct]]<br />Viaducto Ricobayo | | [[Ricobayo Viaduct]]<br />Viaducto Ricobayo | ||
| {{ft to m|(377)|abbr=yes|precision=0}} | | {{ft to m|(377)|abbr=yes|precision=0}} | ||
| Line 141: | Line 141: | ||
|- | |- | ||
| [[Image:1Mentuewwwtremblet.jpg|100px|link=Mentue Bridge]] | | [[Image:1Mentuewwwtremblet.jpg|100px|link=Mentue Bridge]] | ||
| − | | {{sort| | + | | {{sort|1162|1162}} |
| [[Mentue Bridge]]<br />Pont sur la Mentue | | [[Mentue Bridge]]<br />Pont sur la Mentue | ||
| {{ft to m|377|abbr=yes|precision=0}} | | {{ft to m|377|abbr=yes|precision=0}} | ||
| Line 150: | Line 150: | ||
|- | |- | ||
| [[Image:1LignonViaduc.jpg|100px|link=Lignon Viaduct]] | | [[Image:1LignonViaduc.jpg|100px|link=Lignon Viaduct]] | ||
| − | | {{sort| | + | | {{sort|1163|1163}} |
| [[Lignon Viaduct]]<br />Viaduc Lignon | | [[Lignon Viaduct]]<br />Viaduc Lignon | ||
| {{ft to m|(377)|abbr=yes|precision=0}} | | {{ft to m|(377)|abbr=yes|precision=0}} | ||
| Line 159: | Line 159: | ||
|- | |- | ||
| [[Image:Nuttlar By Michael Kramer.jpg|100px|link=Nuttlar Bridge]] | | [[Image:Nuttlar By Michael Kramer.jpg|100px|link=Nuttlar Bridge]] | ||
| − | | {{sort| | + | | {{sort|1164|1164}} |
| [[Nuttlar Bridge]]<br />Nuttlar Brücke | | [[Nuttlar Bridge]]<br />Nuttlar Brücke | ||
| {{ft to m|(377)|abbr=yes|precision=0}} | | {{ft to m|(377)|abbr=yes|precision=0}} | ||
| Line 168: | Line 168: | ||
|- | |- | ||
| [[Image:1TakachihoArchBridge.jpg|100px|link=Shintotakachiho Bridge]] | | [[Image:1TakachihoArchBridge.jpg|100px|link=Shintotakachiho Bridge]] | ||
| − | | {{sort| | + | | {{sort|1165|1165}} |
| [[Shintotakachiho Bridge]]<br />神都高千穂大橋 | | [[Shintotakachiho Bridge]]<br />神都高千穂大橋 | ||
| {{ft to m|377|abbr=yes|precision=0}} | | {{ft to m|377|abbr=yes|precision=0}} | ||
| Line 177: | Line 177: | ||
|- | |- | ||
| [[Image:Tanohata.jpg|100px|link=Shiyui Bridge]] | | [[Image:Tanohata.jpg|100px|link=Shiyui Bridge]] | ||
| − | | {{sort| | + | | {{sort|1166|1166}} |
| [[Shiyui Bridge]]<br />思惟大橋 | | [[Shiyui Bridge]]<br />思惟大橋 | ||
| {{ft to m|377|abbr=yes|precision=0}} | | {{ft to m|377|abbr=yes|precision=0}} | ||
| Line 186: | Line 186: | ||
|- | |- | ||
| [[Image:Aoba-Ohashi.jpg|100px|link=Aoba Bridge]] | | [[Image:Aoba-Ohashi.jpg|100px|link=Aoba Bridge]] | ||
| − | | {{sort| | + | | {{sort|1167|1167}} |
| [[Aoba Bridge]]<br />青葉大橋 | | [[Aoba Bridge]]<br />青葉大橋 | ||
| {{ft to m|377|abbr=yes|precision=0}} | | {{ft to m|377|abbr=yes|precision=0}} | ||
| Line 195: | Line 195: | ||
|- | |- | ||
| [[Image:DuliujiangGog.jpg|100px|link=Duliujiang Bridge Number 1]] | | [[Image:DuliujiangGog.jpg|100px|link=Duliujiang Bridge Number 1]] | ||
| − | | {{sort| | + | | {{sort|1168|1168}} |
| [[Duliujiang Bridge Number 1]]<br />都柳江一号大桥 | | [[Duliujiang Bridge Number 1]]<br />都柳江一号大桥 | ||
| {{ft to m|(377)|abbr=yes|precision=0}} | | {{ft to m|(377)|abbr=yes|precision=0}} | ||
| Line 204: | Line 204: | ||
|- | |- | ||
| [[Image:BeipanjiangFadeTrussSideGorge.jpg|100px|link=Beipanjiang Bridge Fade]] | | [[Image:BeipanjiangFadeTrussSideGorge.jpg|100px|link=Beipanjiang Bridge Fade]] | ||
| − | | {{sort| | + | | {{sort|1169|1169}} |
| [[Beipanjiang Bridge Fade]]<br />北盘江桥 | | [[Beipanjiang Bridge Fade]]<br />北盘江桥 | ||
| {{ft to m|377|abbr=yes|precision=0}} | | {{ft to m|377|abbr=yes|precision=0}} | ||
| Line 213: | Line 213: | ||
|- | |- | ||
| [[Image:VispOld.jpg|100px|link=Stalden Bridge]] | | [[Image:VispOld.jpg|100px|link=Stalden Bridge]] | ||
| − | | {{sort| | + | | {{sort|1170|1170}} |
| [[Stalden Bridge]]<br />Pont Stalden <br />Merjubrigga Stalden | | [[Stalden Bridge]]<br />Pont Stalden <br />Merjubrigga Stalden | ||
| {{ft to m|377|abbr=yes|precision=0}} | | {{ft to m|377|abbr=yes|precision=0}} | ||
| Line 222: | Line 222: | ||
|- | |- | ||
| [[Image:BabinaAerial.jpg|100px|link=Babina Bridge]] | | [[Image:BabinaAerial.jpg|100px|link=Babina Bridge]] | ||
| − | | {{sort| | + | | {{sort|1171|1171}} |
| [[Babina Bridge]]<br />Babina Rijeka | | [[Babina Bridge]]<br />Babina Rijeka | ||
| {{ft to m|377|abbr=yes|precision=0}} | | {{ft to m|377|abbr=yes|precision=0}} | ||
| Line 231: | Line 231: | ||
|- | |- | ||
| [[Image:1WanzhouYangtzeNo2.jpg|100px|link=Wanzhou Yangtze River Bridge Number 2]] | | [[Image:1WanzhouYangtzeNo2.jpg|100px|link=Wanzhou Yangtze River Bridge Number 2]] | ||
| − | | {{sort| | + | | {{sort|1172|1172}} |
| [[Wanzhou Yangtze River Bridge Number 2]]<br />万州长江二桥 | | [[Wanzhou Yangtze River Bridge Number 2]]<br />万州长江二桥 | ||
| {{ft to m|374|abbr=yes|precision=0}} | | {{ft to m|374|abbr=yes|precision=0}} | ||
| Line 240: | Line 240: | ||
|- | |- | ||
| [[Image:MengzhaiBridgeView5.jpg|100px|link=Mengzhai Bridge]] | | [[Image:MengzhaiBridgeView5.jpg|100px|link=Mengzhai Bridge]] | ||
| − | | {{sort| | + | | {{sort|1173|1173}} |
| [[Mengzhai Bridge]]<br />孟寨大桥 | | [[Mengzhai Bridge]]<br />孟寨大桥 | ||
| {{ft to m|(377)|abbr=yes|precision=0}} | | {{ft to m|(377)|abbr=yes|precision=0}} | ||
| Line 249: | Line 249: | ||
|- | |- | ||
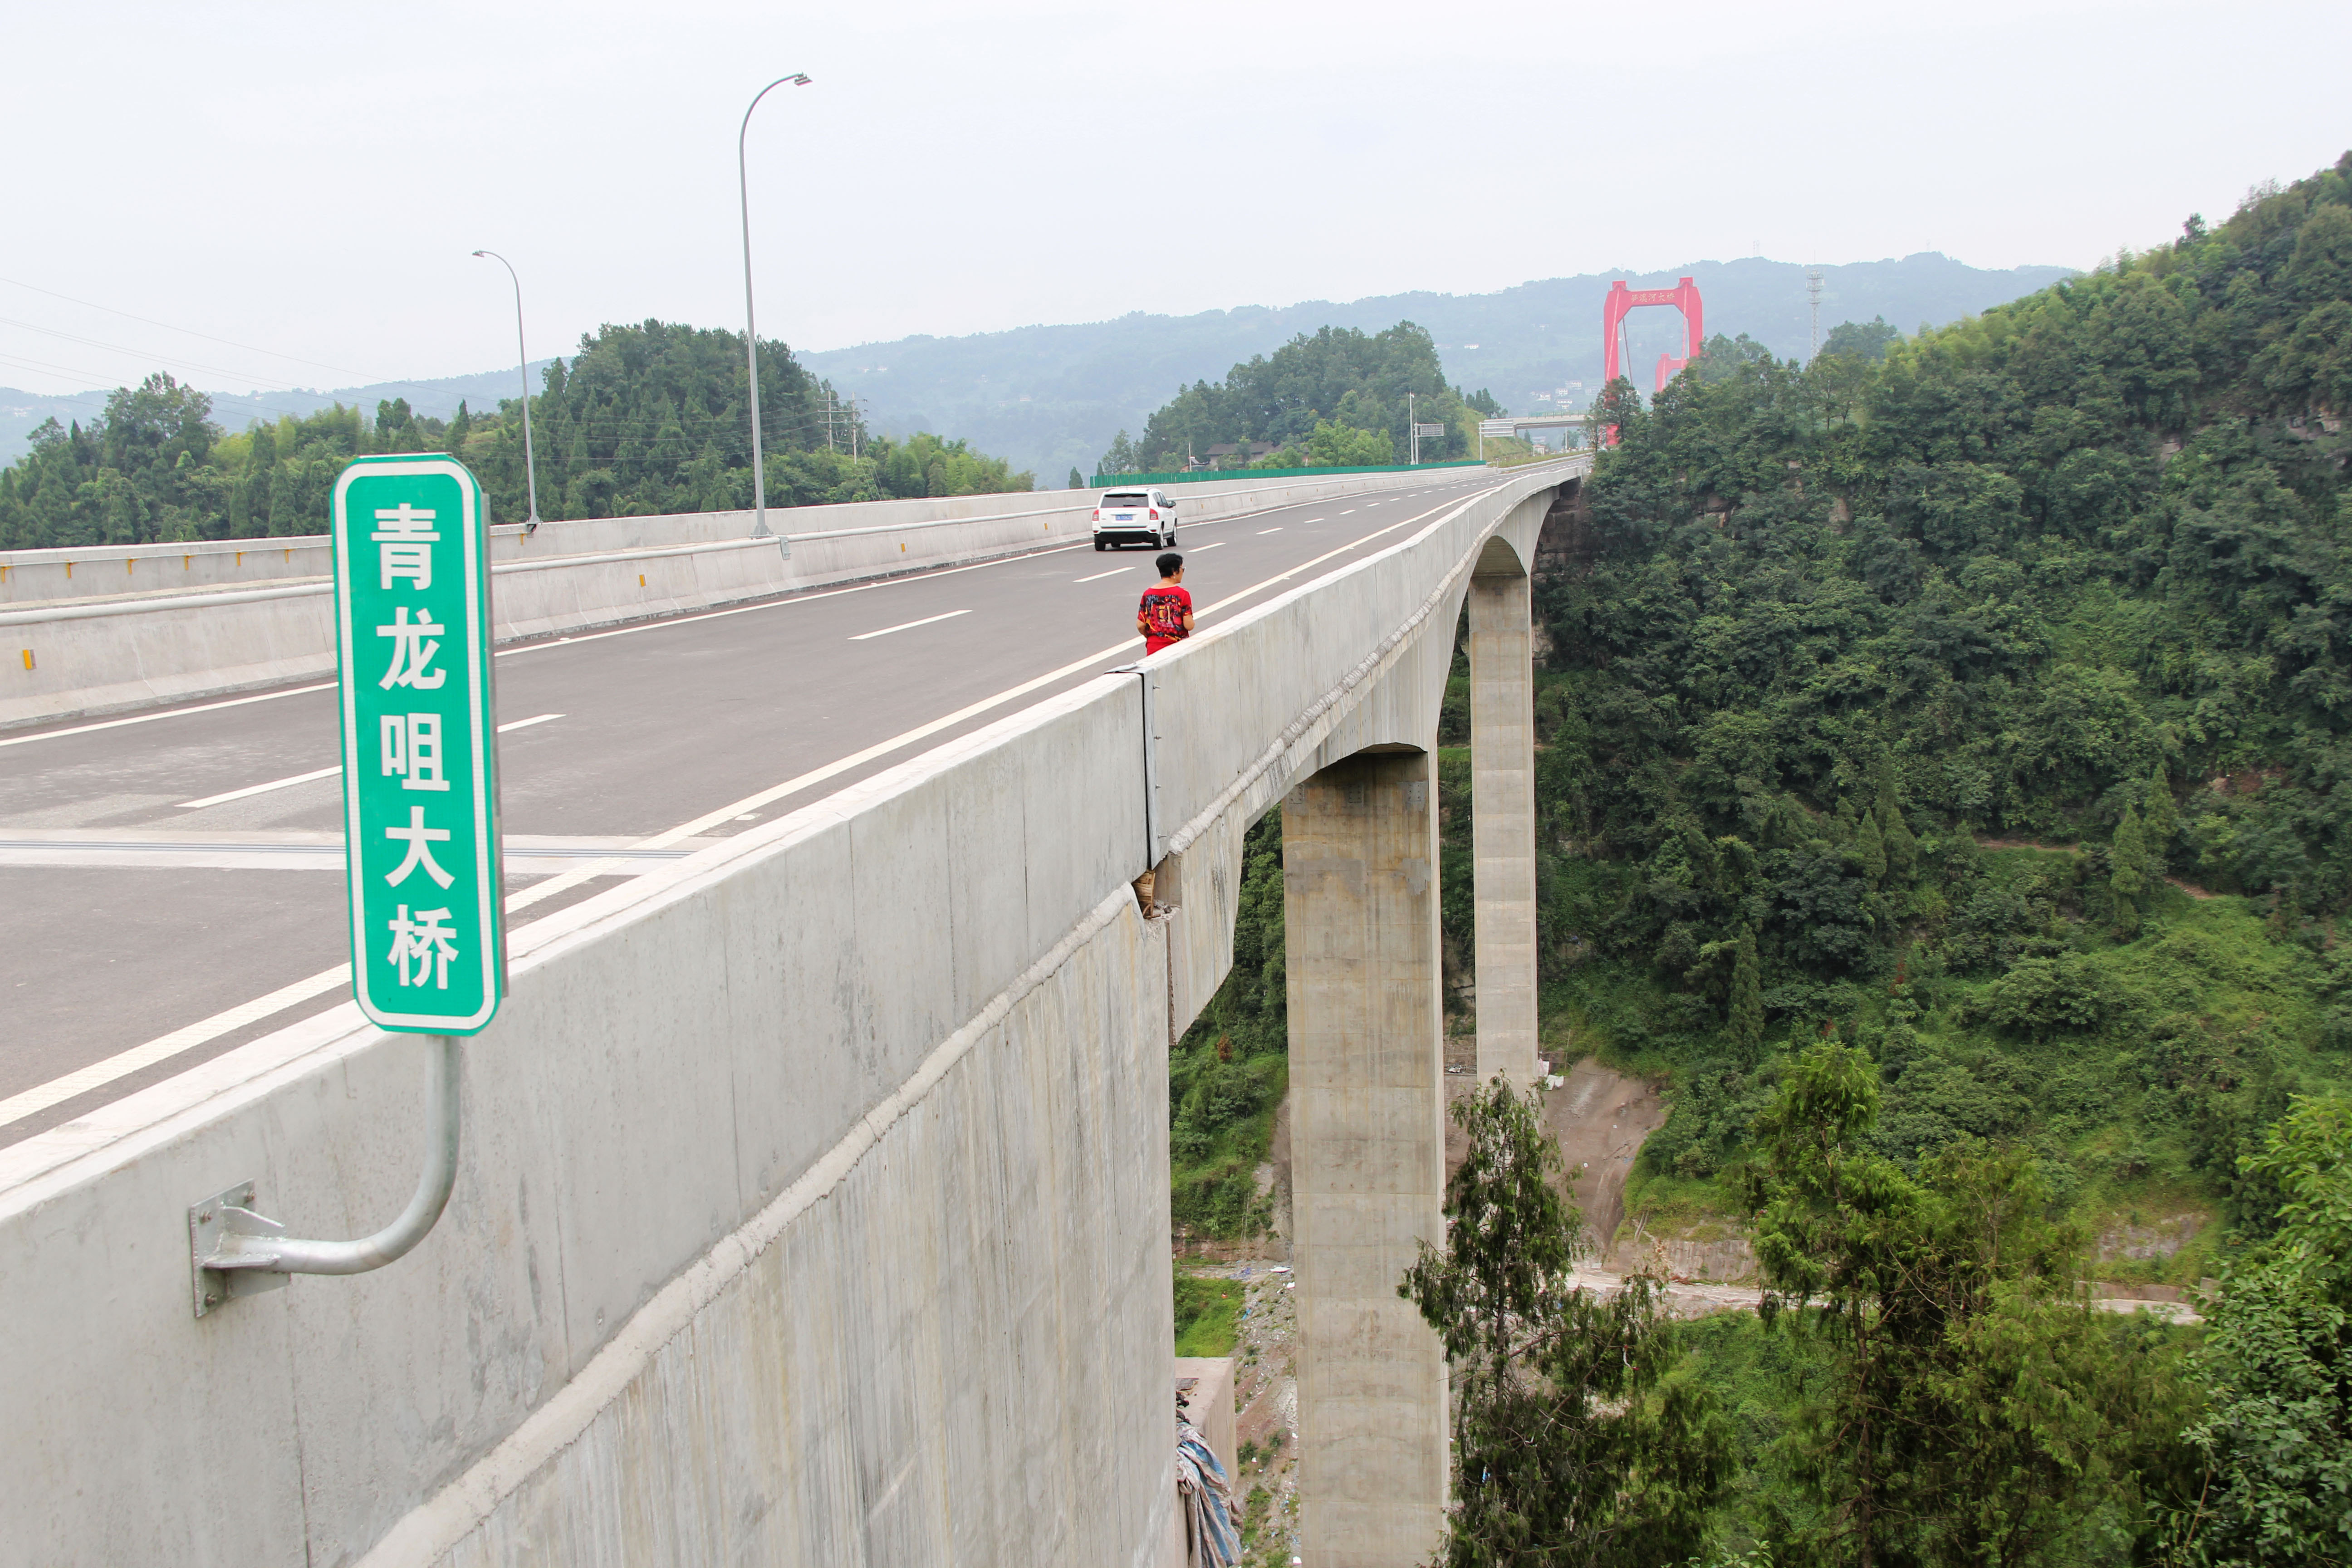
| [[Image:Paomapo2.JPG|100px|link=Qinglongzui Bridge]] | | [[Image:Paomapo2.JPG|100px|link=Qinglongzui Bridge]] | ||
| − | | {{sort| | + | | {{sort|1174|1174}} |
| [[Qinglongzui Bridge]]<br />青龙咀大桥 | | [[Qinglongzui Bridge]]<br />青龙咀大桥 | ||
| {{ft to m|377|abbr=yes|precision=0}} | | {{ft to m|377|abbr=yes|precision=0}} | ||
| Line 258: | Line 258: | ||
|- | |- | ||
| [[Image:Wolonggou -4 Bridge pier.jpg|100px|link=Wolonggou Number 4 Bridge]] | | [[Image:Wolonggou -4 Bridge pier.jpg|100px|link=Wolonggou Number 4 Bridge]] | ||
| − | | {{sort| | + | | {{sort|1175|1175}} |
| [[Wolonggou Number 4 Bridge]]<br />卧龙沟4号特大桥 | | [[Wolonggou Number 4 Bridge]]<br />卧龙沟4号特大桥 | ||
| {{ft to m|(377)|abbr=yes|precision=0}} | | {{ft to m|(377)|abbr=yes|precision=0}} | ||
| Line 267: | Line 267: | ||
|- | |- | ||
| [[Image:BaishuiheRender.jpg|100px|link=Baishuihe S209 Bridge]] | | [[Image:BaishuiheRender.jpg|100px|link=Baishuihe S209 Bridge]] | ||
| − | | {{sort| | + | | {{sort|1176|1176}} |
| [[Baishuihe S209 Bridge]]<br />白水河大桥 | | [[Baishuihe S209 Bridge]]<br />白水河大桥 | ||
| {{ft to m|(377)|abbr=yes|precision=0}} | | {{ft to m|(377)|abbr=yes|precision=0}} | ||
| Line 276: | Line 276: | ||
|- | |- | ||
| [[Image:Completed2013.jpg|100px|link=Jinshajiang Bridge Luoguo]] | | [[Image:Completed2013.jpg|100px|link=Jinshajiang Bridge Luoguo]] | ||
| − | | {{sort| | + | | {{sort|1177|1177}} |
| [[Jinshajiang Bridge Luoguo]]<br />倮果金沙江特大桥 | | [[Jinshajiang Bridge Luoguo]]<br />倮果金沙江特大桥 | ||
| {{ft to m|377|abbr=yes|precision=0}} | | {{ft to m|377|abbr=yes|precision=0}} | ||
| Line 285: | Line 285: | ||
|- | |- | ||
| [[Image:Baijianhe.jpg|100px|link=Baijianhe Bridge]] | | [[Image:Baijianhe.jpg|100px|link=Baijianhe Bridge]] | ||
| − | | {{sort| | + | | {{sort|1178|1178}} |
| [[Baijianhe Bridge]]<br />白涧河特大桥 | | [[Baijianhe Bridge]]<br />白涧河特大桥 | ||
| {{ft to m|(377)|abbr=yes|precision=0}} | | {{ft to m|(377)|abbr=yes|precision=0}} | ||
| Line 294: | Line 294: | ||
|- | |- | ||
| [[Image:Taoyuan.jpg|100px|link=Taoyuan Bridge]] | | [[Image:Taoyuan.jpg|100px|link=Taoyuan Bridge]] | ||
| − | | {{sort| | + | | {{sort|1179|1179}} |
| [[Taoyuan Bridge]]<br />桃园大桥 | | [[Taoyuan Bridge]]<br />桃园大桥 | ||
| {{ft to m|(377)|abbr=yes|precision=0}} | | {{ft to m|(377)|abbr=yes|precision=0}} | ||
| Line 303: | Line 303: | ||
|- | |- | ||
| [[Image:Litou Bridge 202006.jpeg|100px|link=Litou Bridge]] | | [[Image:Litou Bridge 202006.jpeg|100px|link=Litou Bridge]] | ||
| − | | {{sort| | + | | {{sort|1180|1180}} |
| [[Litou Bridge]]<br />利头大桥 | | [[Litou Bridge]]<br />利头大桥 | ||
| {{ft to m|(377)|abbr=yes|precision=0}} | | {{ft to m|(377)|abbr=yes|precision=0}} | ||
| Line 312: | Line 312: | ||
|- | |- | ||
| [[Image:GutonggouSatellite.jpg|100px|link=Gutonggou Bridge]] | | [[Image:GutonggouSatellite.jpg|100px|link=Gutonggou Bridge]] | ||
| − | | {{sort| | + | | {{sort|1181|1181}} |
| [[Gutonggou Bridge]]<br />古铜沟大桥 | | [[Gutonggou Bridge]]<br />古铜沟大桥 | ||
| {{ft to m|(377)|abbr=yes|precision=0}} | | {{ft to m|(377)|abbr=yes|precision=0}} | ||
| Line 321: | Line 321: | ||
|- | |- | ||
| [[Image:XuefenghuComplete.jpg|100px|link=Xuefenghu Bridge]] | | [[Image:XuefenghuComplete.jpg|100px|link=Xuefenghu Bridge]] | ||
| − | | {{sort| | + | | {{sort|1182|1182}} |
| [[Xuefenghu Bridge]]<br />雪峰湖特大桥 | | [[Xuefenghu Bridge]]<br />雪峰湖特大桥 | ||
| {{ft to m|(377)|abbr=yes|precision=0}} | | {{ft to m|(377)|abbr=yes|precision=0}} | ||
| Line 330: | Line 330: | ||
|- | |- | ||
| [[Image:Daqingshan Glass5.jpg|100px|link=Daqingshan Glass Footbridge]] | | [[Image:Daqingshan Glass5.jpg|100px|link=Daqingshan Glass Footbridge]] | ||
| − | | {{sort| | + | | {{sort|1183|1183}} |
| [[Daqingshan Glass Footbridge]]<br />大青山玻璃吊桥 | | [[Daqingshan Glass Footbridge]]<br />大青山玻璃吊桥 | ||
| {{ft to m|(377)|abbr=yes|precision=0}} | | {{ft to m|(377)|abbr=yes|precision=0}} | ||
| Line 339: | Line 339: | ||
|- | |- | ||
| [[Image:NiujiaogangSatelliteImageClose.jpg|100px|link=Ganhuaxi Bridge]] | | [[Image:NiujiaogangSatelliteImageClose.jpg|100px|link=Ganhuaxi Bridge]] | ||
| − | | {{sort| | + | | {{sort|1184|1184}} |
| [[Ganhuaxi Bridge]]<br />感化溪特大桥 | | [[Ganhuaxi Bridge]]<br />感化溪特大桥 | ||
| {{ft to m|(374)|abbr=yes|precision=0}} | | {{ft to m|(374)|abbr=yes|precision=0}} | ||
| Line 348: | Line 348: | ||
|- | |- | ||
| [[Image:LucixiSatellite.jpg|100px|link=Lucixi Bridge]] | | [[Image:LucixiSatellite.jpg|100px|link=Lucixi Bridge]] | ||
| − | | {{sort| | + | | {{sort|1185|1185}} |
| [[Lucixi Bridge]]<br />路磁溪大桥 | | [[Lucixi Bridge]]<br />路磁溪大桥 | ||
| {{ft to m|(374)|abbr=yes|precision=0}} | | {{ft to m|(374)|abbr=yes|precision=0}} | ||
| Line 357: | Line 357: | ||
|- | |- | ||
| [[Image:YijuheConstSide.jpg|100px|link=Yijuhe Bridge]] | | [[Image:YijuheConstSide.jpg|100px|link=Yijuhe Bridge]] | ||
| − | | {{sort| | + | | {{sort|1186|1186}} |
| [[Yijuhe Bridge]]<br />宜居河大桥 | | [[Yijuhe Bridge]]<br />宜居河大桥 | ||
| {{ft to m|374|abbr=yes|precision=0}} | | {{ft to m|374|abbr=yes|precision=0}} | ||
| Line 366: | Line 366: | ||
|- | |- | ||
| [[Image:LarzenbachByInViennaVeritas.jpg|100px|link=Larzenbach Bridge]] | | [[Image:LarzenbachByInViennaVeritas.jpg|100px|link=Larzenbach Bridge]] | ||
| − | | {{sort| | + | | {{sort|1187|1187}} |
| [[Larzenbach Bridge]]<br />Talübergang Larzenbach | | [[Larzenbach Bridge]]<br />Talübergang Larzenbach | ||
| {{ft to m|375|abbr=yes|precision=0}} | | {{ft to m|375|abbr=yes|precision=0}} | ||
| Line 375: | Line 375: | ||
|- | |- | ||
| [[Image:FengshiheViaduct2.jpg|100px|link=Fengshihe Bridge]] | | [[Image:FengshiheViaduct2.jpg|100px|link=Fengshihe Bridge]] | ||
| − | | {{sort| | + | | {{sort|1188|1188}} |
| [[Fengshihe Bridge]]<br />逢石河特大桥 | | [[Fengshihe Bridge]]<br />逢石河特大桥 | ||
| {{ft to m|(374)|abbr=yes|precision=0}} | | {{ft to m|(374)|abbr=yes|precision=0}} | ||
| Line 384: | Line 384: | ||
|- | |- | ||
| [[Image:Highline179Side.jpg|100px|link=Highline 179 Footbridge]] | | [[Image:Highline179Side.jpg|100px|link=Highline 179 Footbridge]] | ||
| − | | {{sort| | + | | {{sort|1189|1189}} |
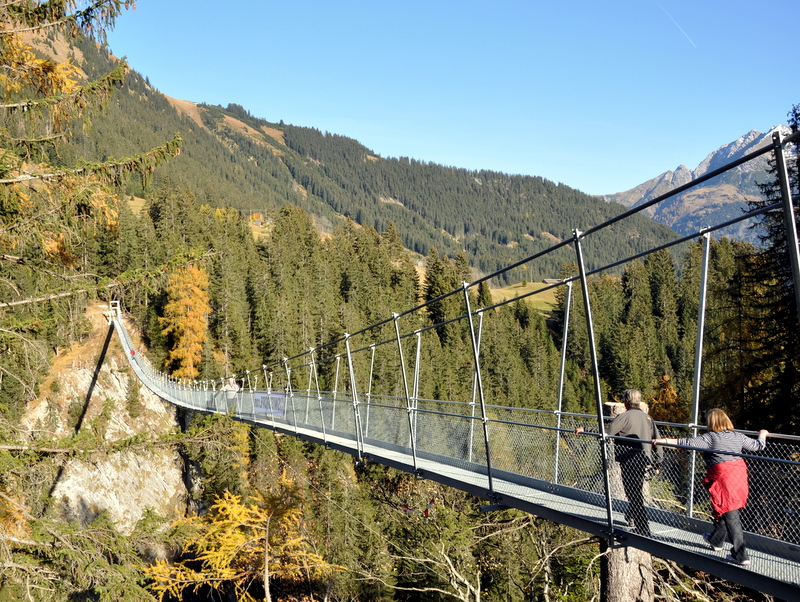
| [[Highline 179 Footbridge]]<br /> | | [[Highline 179 Footbridge]]<br /> | ||
| {{ft to m|374|abbr=yes|precision=0}} | | {{ft to m|374|abbr=yes|precision=0}} | ||
| Line 393: | Line 393: | ||
|- | |- | ||
| [[Image:MameyakibashiBridge.jpg|100px|link=Mameyaki Bridge]] | | [[Image:MameyakibashiBridge.jpg|100px|link=Mameyaki Bridge]] | ||
| − | | {{sort| | + | | {{sort|1190|1190}} |
| [[Mameyaki Bridge]]<br />豆焼き橋 | | [[Mameyaki Bridge]]<br />豆焼き橋 | ||
| {{ft to m|371|abbr=yes|precision=0}} | | {{ft to m|371|abbr=yes|precision=0}} | ||
| Line 402: | Line 402: | ||
|- | |- | ||
| [[Image:1TenoyaPuente.jpg|100px|link=Tenoya Viaduct]] | | [[Image:1TenoyaPuente.jpg|100px|link=Tenoya Viaduct]] | ||
| − | | {{sort| | + | | {{sort|1191|1191}} |
| [[Tenoya Viaduct]]<br />Viaducto Tenoya | | [[Tenoya Viaduct]]<br />Viaducto Tenoya | ||
| {{ft to m|371|abbr=yes|precision=0}} | | {{ft to m|371|abbr=yes|precision=0}} | ||
| Line 411: | Line 411: | ||
|- | |- | ||
| [[Image:FeilongDeckView.jpg|100px|link=Feilong Bridge]] | | [[Image:FeilongDeckView.jpg|100px|link=Feilong Bridge]] | ||
| − | | {{sort| | + | | {{sort|1192|1192}} |
| [[Feilong Bridge]]<br />飞龙大桥 | | [[Feilong Bridge]]<br />飞龙大桥 | ||
| {{ft to m|371|abbr=yes|precision=0}} | | {{ft to m|371|abbr=yes|precision=0}} | ||
| Line 420: | Line 420: | ||
|- | |- | ||
| [[Image:HuangjiagouSatellite.jpg|100px|link=Huangjiagou Bridge]] | | [[Image:HuangjiagouSatellite.jpg|100px|link=Huangjiagou Bridge]] | ||
| − | | {{sort| | + | | {{sort|1193|1193}} |
| [[Huangjiagou Bridge]]<br />黄家沟大桥 | | [[Huangjiagou Bridge]]<br />黄家沟大桥 | ||
| {{ft to m|371|abbr=yes|precision=0}} | | {{ft to m|371|abbr=yes|precision=0}} | ||
| Line 429: | Line 429: | ||
|- | |- | ||
| [[Image:YinchanggouSlope.jpg|100px|link=Yinchanggou Bridge]] | | [[Image:YinchanggouSlope.jpg|100px|link=Yinchanggou Bridge]] | ||
| − | | {{sort| | + | | {{sort|1194|1194}} |
| [[Yinchanggou Bridge]]<br />银长沟大桥 | | [[Yinchanggou Bridge]]<br />银长沟大桥 | ||
| {{ft to m|371|abbr=yes|precision=0}} | | {{ft to m|371|abbr=yes|precision=0}} | ||
| Line 438: | Line 438: | ||
|- | |- | ||
| [[Image:Chengdu-KunHwy90mtrSpan.jpg|100px|link=Chengmendong Bridge]] | | [[Image:Chengdu-KunHwy90mtrSpan.jpg|100px|link=Chengmendong Bridge]] | ||
| − | | {{sort| | + | | {{sort|1195|1195}} |
| [[Chengmendong Bridge]]<br />城门洞大桥 | | [[Chengmendong Bridge]]<br />城门洞大桥 | ||
| {{ft to m|371|abbr=yes|precision=0}} | | {{ft to m|371|abbr=yes|precision=0}} | ||
| Line 447: | Line 447: | ||
|- | |- | ||
| [[Image:QingqubaS25Beam113mtrH.jpg|100px|link=Qingquba Bridge]] | | [[Image:QingqubaS25Beam113mtrH.jpg|100px|link=Qingquba Bridge]] | ||
| − | | {{sort| | + | | {{sort|1196|1196}} |
| [[Qingquba Bridge]]<br />青曲坝大桥 | | [[Qingquba Bridge]]<br />青曲坝大桥 | ||
| {{ft to m|371|abbr=yes|precision=0}} | | {{ft to m|371|abbr=yes|precision=0}} | ||
| Line 456: | Line 456: | ||
|- | |- | ||
| [[Image:1LewistonQueenstonArch.jpg|100px|link=Lewiston-Queenston Bridge]] | | [[Image:1LewistonQueenstonArch.jpg|100px|link=Lewiston-Queenston Bridge]] | ||
| − | | {{sort| | + | | {{sort|1197|1197}} |
| [[Lewiston-Queenston Bridge]]<br /> | | [[Lewiston-Queenston Bridge]]<br /> | ||
| {{ft to m|370|abbr=yes|precision=0}} | | {{ft to m|370|abbr=yes|precision=0}} | ||
| Line 465: | Line 465: | ||
|- | |- | ||
| [[Image:HoffstadtAerial.jpg|100px|link=Hoffstadt Creek Bridge]] | | [[Image:HoffstadtAerial.jpg|100px|link=Hoffstadt Creek Bridge]] | ||
| − | | {{sort| | + | | {{sort|1198|1198}} |
| [[Hoffstadt Creek Bridge]]<br /> | | [[Hoffstadt Creek Bridge]]<br /> | ||
| {{ft to m|370|abbr=yes|precision=0}} | | {{ft to m|370|abbr=yes|precision=0}} | ||
| Line 474: | Line 474: | ||
|- | |- | ||
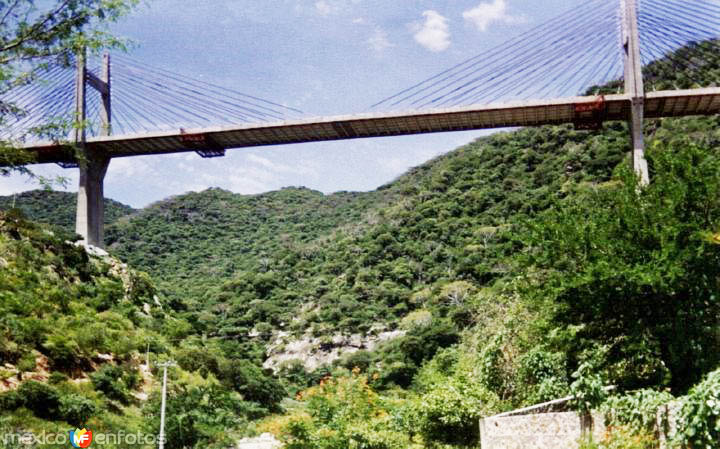
| [[Image:MarquesRailwayBridgeByJohn Huerta.jpg|100px|link=Marques Railway Bridge]] | | [[Image:MarquesRailwayBridgeByJohn Huerta.jpg|100px|link=Marques Railway Bridge]] | ||
| − | | {{sort| | + | | {{sort|1199|1199}} |
| [[Marques Railway Bridge]]<br />Puente del Marques | | [[Marques Railway Bridge]]<br />Puente del Marques | ||
| {{ft to m|367|abbr=yes|precision=0}} | | {{ft to m|367|abbr=yes|precision=0}} | ||
| Line 483: | Line 483: | ||
|- | |- | ||
| [[Image:BisantisRino_Porrovecchio.jpg|100px|link=Fausto Bisantis Bridge]] | | [[Image:BisantisRino_Porrovecchio.jpg|100px|link=Fausto Bisantis Bridge]] | ||
| − | | {{sort| | + | | {{sort|1200|1200}} |
| [[Fausto Bisantis Bridge]]<br />Ponte Fausto Bisantis <br />Fiumarella Bridge <br />Ponte Fiumarella | | [[Fausto Bisantis Bridge]]<br />Ponte Fausto Bisantis <br />Fiumarella Bridge <br />Ponte Fiumarella | ||
| {{ft to m|367|abbr=yes|precision=0}} | | {{ft to m|367|abbr=yes|precision=0}} | ||
| Line 492: | Line 492: | ||
|- | |- | ||
| [[Image:MalingheOne2015View.jpg|100px|link=Malinghe Bridge One]] | | [[Image:MalingheOne2015View.jpg|100px|link=Malinghe Bridge One]] | ||
| − | | {{sort| | + | | {{sort|1201|1201}} |
| [[Malinghe Bridge One]]<br />马岭河大桥 | | [[Malinghe Bridge One]]<br />马岭河大桥 | ||
| {{ft to m|367|abbr=yes|precision=0}} | | {{ft to m|367|abbr=yes|precision=0}} | ||
| Line 501: | Line 501: | ||
|- | |- | ||
| [[Image:BaguSatellite.jpg|100px|link=Bagu Bridge]] | | [[Image:BaguSatellite.jpg|100px|link=Bagu Bridge]] | ||
| − | | {{sort| | + | | {{sort|1202|1202}} |
| [[Bagu Bridge]]<br />坝固特大桥 | | [[Bagu Bridge]]<br />坝固特大桥 | ||
| {{ft to m|367|abbr=yes|precision=0}} | | {{ft to m|367|abbr=yes|precision=0}} | ||
| Line 510: | Line 510: | ||
|- | |- | ||
| [[Image:YaxiExpswyBridge.JPG|100px|link=Shizijinghe Bridge]] | | [[Image:YaxiExpswyBridge.JPG|100px|link=Shizijinghe Bridge]] | ||
| − | | {{sort| | + | | {{sort|1203|1203}} |
| [[Shizijinghe Bridge]]<br />石滓经河大桥 | | [[Shizijinghe Bridge]]<br />石滓经河大桥 | ||
| {{ft to m|367|abbr=yes|precision=0}} | | {{ft to m|367|abbr=yes|precision=0}} | ||
| Line 519: | Line 519: | ||
|- | |- | ||
| [[Image:JinshajiangJiaopingduCableStayedBeam.jpg|100px|link=Jinshajiang Bridge Jiaopingdu]] | | [[Image:JinshajiangJiaopingduCableStayedBeam.jpg|100px|link=Jinshajiang Bridge Jiaopingdu]] | ||
| − | | {{sort| | + | | {{sort|1204|1204}} |
| [[Jinshajiang Bridge Jiaopingdu]]<br />皎平渡金沙江大桥 | | [[Jinshajiang Bridge Jiaopingdu]]<br />皎平渡金沙江大桥 | ||
| {{ft to m|367|abbr=yes|precision=0}} | | {{ft to m|367|abbr=yes|precision=0}} | ||
| Line 528: | Line 528: | ||
|- | |- | ||
| [[Image:GutianShanghangCoFujian.jpg|100px|link=Jiangjinshan Railway Bridge]] | | [[Image:GutianShanghangCoFujian.jpg|100px|link=Jiangjinshan Railway Bridge]] | ||
| − | | {{sort| | + | | {{sort|1205|1205}} |
| [[Jiangjinshan Railway Bridge]]<br />将金山特大桥 | | [[Jiangjinshan Railway Bridge]]<br />将金山特大桥 | ||
| {{ft to m|367|abbr=yes|precision=0}} | | {{ft to m|367|abbr=yes|precision=0}} | ||
| Line 537: | Line 537: | ||
|- | |- | ||
| [[Image:ZhenzhuView135mtrLong.jpg|100px|link=Zhenzhu Bridge]] | | [[Image:ZhenzhuView135mtrLong.jpg|100px|link=Zhenzhu Bridge]] | ||
| − | | {{sort| | + | | {{sort|1206|1206}} |
| [[Zhenzhu Bridge]]<br />珍珠大桥 | | [[Zhenzhu Bridge]]<br />珍珠大桥 | ||
| {{ft to m|367|abbr=yes|precision=0}} | | {{ft to m|367|abbr=yes|precision=0}} | ||
| Line 546: | Line 546: | ||
|- | |- | ||
| [[Image:JiutianConst.jpg|100px|link=Jiutian Bridge]] | | [[Image:JiutianConst.jpg|100px|link=Jiutian Bridge]] | ||
| − | | {{sort| | + | | {{sort|1207|1207}} |
| [[Jiutian Bridge]]<br />九天大桥 | | [[Jiutian Bridge]]<br />九天大桥 | ||
| {{ft to m|(367)|abbr=yes|precision=0}} | | {{ft to m|(367)|abbr=yes|precision=0}} | ||
| Line 555: | Line 555: | ||
|- | |- | ||
| [[Image:LianhuClosure.jpeg|100px|link=Lianhu Bridge]] | | [[Image:LianhuClosure.jpeg|100px|link=Lianhu Bridge]] | ||
| − | | {{sort| | + | | {{sort|1208|1208}} |
| [[Lianhu Bridge]]<br />连湖大桥 | | [[Lianhu Bridge]]<br />连湖大桥 | ||
| {{ft to m|367|abbr=yes|precision=0}} | | {{ft to m|367|abbr=yes|precision=0}} | ||
| Line 564: | Line 564: | ||
|- | |- | ||
| [[Image:HighSteelDroneView.jpg|100px|link=High Steel Bridge]] | | [[Image:HighSteelDroneView.jpg|100px|link=High Steel Bridge]] | ||
| − | | {{sort| | + | | {{sort|1209|1209}} |
| [[High Steel Bridge]]<br />South Fork Skokomish River | | [[High Steel Bridge]]<br />South Fork Skokomish River | ||
| {{ft to m|365|abbr=yes|precision=0}} | | {{ft to m|365|abbr=yes|precision=0}} | ||
| Line 573: | Line 573: | ||
|- | |- | ||
| [[Image:UnknownRailBeam.jpg|100px|link=Niujiaoping Railway Bridge]] | | [[Image:UnknownRailBeam.jpg|100px|link=Niujiaoping Railway Bridge]] | ||
| − | | {{sort| | + | | {{sort|1210|1210}} |
| [[Niujiaoping Railway Bridge]]<br />牛角坪特大桥 | | [[Niujiaoping Railway Bridge]]<br />牛角坪特大桥 | ||
| {{ft to m|364|abbr=yes|precision=0}} | | {{ft to m|364|abbr=yes|precision=0}} | ||
| Line 582: | Line 582: | ||
|- | |- | ||
| [[Image:YuniheConstruction2.jpg|100px|link=Yunihe Bridge]] | | [[Image:YuniheConstruction2.jpg|100px|link=Yunihe Bridge]] | ||
| − | | {{sort| | + | | {{sort|1211|1211}} |
| [[Yunihe Bridge]]<br />淤泥河桥 | | [[Yunihe Bridge]]<br />淤泥河桥 | ||
| {{ft to m|364|abbr=yes|precision=0}} | | {{ft to m|364|abbr=yes|precision=0}} | ||
| Line 591: | Line 591: | ||
|- | |- | ||
| [[Image:QishuiSatellite .jpg|100px|link=Qishui Bridge]] | | [[Image:QishuiSatellite .jpg|100px|link=Qishui Bridge]] | ||
| − | | {{sort| | + | | {{sort|1212|1212}} |
| [[Qishui Bridge]]<br />淇水大桥 | | [[Qishui Bridge]]<br />淇水大桥 | ||
| {{ft to m|364|abbr=yes|precision=0}} | | {{ft to m|364|abbr=yes|precision=0}} | ||
| Line 600: | Line 600: | ||
|- | |- | ||
| [[Image:ChuanbaRender.jpg|100px|link=Chuanba Bridge]] | | [[Image:ChuanbaRender.jpg|100px|link=Chuanba Bridge]] | ||
| − | | {{sort| | + | | {{sort|1213|1213}} |
| [[Chuanba Bridge]]<br />川坝大桥 | | [[Chuanba Bridge]]<br />川坝大桥 | ||
| {{ft to m|364|abbr=yes|precision=0}} | | {{ft to m|364|abbr=yes|precision=0}} | ||
| Line 609: | Line 609: | ||
|- | |- | ||
| [[Image:LeiternByToni Zwyssig.jpg|100px|link=Leiternweide Footbridge]] | | [[Image:LeiternByToni Zwyssig.jpg|100px|link=Leiternweide Footbridge]] | ||
| − | | {{sort| | + | | {{sort|1214|1214}} |
| [[Leiternweide Footbridge]]<br />Hängebrücke Leiternweide | | [[Leiternweide Footbridge]]<br />Hängebrücke Leiternweide | ||
| {{ft to m|364|abbr=yes|precision=0}} | | {{ft to m|364|abbr=yes|precision=0}} | ||
| Line 618: | Line 618: | ||
|- | |- | ||
| [[Image:PuanNo.1BeamView.jpg|100px|link=Puan Bridge Number 1]] | | [[Image:PuanNo.1BeamView.jpg|100px|link=Puan Bridge Number 1]] | ||
| − | | {{sort| | + | | {{sort|1215|1215}} |
| [[Puan Bridge Number 1]]<br />普安1号大桥 | | [[Puan Bridge Number 1]]<br />普安1号大桥 | ||
| {{ft to m|(364)|abbr=yes|precision=0}} | | {{ft to m|(364)|abbr=yes|precision=0}} | ||
| Line 627: | Line 627: | ||
|- | |- | ||
| [[Image:QuetzalapaByFrancisco Aguilar Zamora.jpg|100px|link=Quetzalapa Bridge]] | | [[Image:QuetzalapaByFrancisco Aguilar Zamora.jpg|100px|link=Quetzalapa Bridge]] | ||
| − | | {{sort| | + | | {{sort|1216|1216}} |
| [[Quetzalapa Bridge]]<br />Puente Quetzalapa | | [[Quetzalapa Bridge]]<br />Puente Quetzalapa | ||
| {{ft to m|(361)|abbr=yes|precision=0}} | | {{ft to m|(361)|abbr=yes|precision=0}} | ||
| Line 636: | Line 636: | ||
|- | |- | ||
| [[Image:Haengebruecke Holzgau oktober2011 5.JPG|100px|link=Holzgau Footbridge]] | | [[Image:Haengebruecke Holzgau oktober2011 5.JPG|100px|link=Holzgau Footbridge]] | ||
| − | | {{sort| | + | | {{sort|1217|1217}} |
| [[Holzgau Footbridge]]<br />Hängebrücke Holzgau | | [[Holzgau Footbridge]]<br />Hängebrücke Holzgau | ||
| {{ft to m|361|abbr=yes|precision=0}} | | {{ft to m|361|abbr=yes|precision=0}} | ||
| Line 645: | Line 645: | ||
|- | |- | ||
| [[Image:Changxi copy.jpg|100px|link=Changxi Bridge]] | | [[Image:Changxi copy.jpg|100px|link=Changxi Bridge]] | ||
| − | | {{sort| | + | | {{sort|1218|1218}} |
| [[Changxi Bridge]]<br />厂溪特大桥 | | [[Changxi Bridge]]<br />厂溪特大桥 | ||
| {{ft to m|(361)|abbr=yes|precision=0}} | | {{ft to m|(361)|abbr=yes|precision=0}} | ||
| Line 654: | Line 654: | ||
|- | |- | ||
| [[Image:Sanchaxi Render.jpg|100px|link=Sanchaxi Bridge]] | | [[Image:Sanchaxi Render.jpg|100px|link=Sanchaxi Bridge]] | ||
| − | | {{sort| | + | | {{sort|1219|1219}} |
| [[Sanchaxi Bridge]]<br />三插溪特大桥 | | [[Sanchaxi Bridge]]<br />三插溪特大桥 | ||
| {{ft to m|(361)|abbr=yes|precision=0}} | | {{ft to m|(361)|abbr=yes|precision=0}} | ||
| Line 663: | Line 663: | ||
|- | |- | ||
| [[Image:DashitianHighDown.jpg|100px|link=Dashitian Bridge]] | | [[Image:DashitianHighDown.jpg|100px|link=Dashitian Bridge]] | ||
| − | | {{sort| | + | | {{sort|1220|1220}} |
| [[Dashitian Bridge]]<br />大石田特大桥 | | [[Dashitian Bridge]]<br />大石田特大桥 | ||
| {{ft to m|361|abbr=yes|precision=0}} | | {{ft to m|361|abbr=yes|precision=0}} | ||
| Line 672: | Line 672: | ||
|- | |- | ||
| [[Image:HongshishanDrone.jpg|100px|link=Hongshishan Bridge]] | | [[Image:HongshishanDrone.jpg|100px|link=Hongshishan Bridge]] | ||
| − | | {{sort| | + | | {{sort|1221|1221}} |
| [[Hongshishan Bridge]]<br />红石山大桥 | | [[Hongshishan Bridge]]<br />红石山大桥 | ||
| {{ft to m|(361)|abbr=yes|precision=0}} | | {{ft to m|(361)|abbr=yes|precision=0}} | ||
| Line 681: | Line 681: | ||
|- | |- | ||
| [[Image:ShihuiyaogouS303Satellite.jpg|100px|link=Shihuiyaogou Bridge S303]] | | [[Image:ShihuiyaogouS303Satellite.jpg|100px|link=Shihuiyaogou Bridge S303]] | ||
| − | | {{sort| | + | | {{sort|1222|1222}} |
| [[Shihuiyaogou Bridge S303]]<br />石灰窑沟大桥 | | [[Shihuiyaogou Bridge S303]]<br />石灰窑沟大桥 | ||
| {{ft to m|(361)|abbr=yes|precision=0}} | | {{ft to m|(361)|abbr=yes|precision=0}} | ||
| Line 690: | Line 690: | ||
|- | |- | ||
| [[Image:Yuantou1.jpg|100px|link=Yuantou Reservoir Bridge]] | | [[Image:Yuantou1.jpg|100px|link=Yuantou Reservoir Bridge]] | ||
| − | | {{sort| | + | | {{sort|1223|1223}} |
| [[Yuantou Reservoir Bridge]]<br />源头水库特大桥 | | [[Yuantou Reservoir Bridge]]<br />源头水库特大桥 | ||
| {{ft to m|(361)|abbr=yes|precision=0}} | | {{ft to m|(361)|abbr=yes|precision=0}} | ||
| Line 699: | Line 699: | ||
|- | |- | ||
| [[Image:Niulanjiang Bridge Duxiang.jpg|100px|link=Niulanjiang Bridge Duxiang]] | | [[Image:Niulanjiang Bridge Duxiang.jpg|100px|link=Niulanjiang Bridge Duxiang]] | ||
| − | | {{sort| | + | | {{sort|1224|1224}} |
| [[Niulanjiang Bridge Duxiang]]<br />都香高速牛栏江特大桥 | | [[Niulanjiang Bridge Duxiang]]<br />都香高速牛栏江特大桥 | ||
| {{ft to m|(361)|abbr=yes|precision=0}} | | {{ft to m|(361)|abbr=yes|precision=0}} | ||
| Line 708: | Line 708: | ||
|- | |- | ||
| [[Image:TigerLeapingSusuworld.jpg|100px|link=Shenchuan Bridge]] | | [[Image:TigerLeapingSusuworld.jpg|100px|link=Shenchuan Bridge]] | ||
| − | | {{sort| | + | | {{sort|1225|1225}} |
| [[Shenchuan Bridge]]<br />神川大桥 | | [[Shenchuan Bridge]]<br />神川大桥 | ||
| {{ft to m|361|abbr=yes|precision=0}} | | {{ft to m|361|abbr=yes|precision=0}} | ||
| Line 717: | Line 717: | ||
|- | |- | ||
| [[Image:XigouJinjiHwy2.jpg|100px|link=Xigou Bridge]] | | [[Image:XigouJinjiHwy2.jpg|100px|link=Xigou Bridge]] | ||
| − | | {{sort| | + | | {{sort|1226|1226}} |
| [[Xigou Bridge]]<br />西沟大桥 | | [[Xigou Bridge]]<br />西沟大桥 | ||
| {{ft to m|(361)|abbr=yes|precision=0}} | | {{ft to m|(361)|abbr=yes|precision=0}} | ||
| Line 726: | Line 726: | ||
|- | |- | ||
| [[Image:Dujianghe closure.jpeg|100px|link=Dujianghe Bridge]] | | [[Image:Dujianghe closure.jpeg|100px|link=Dujianghe Bridge]] | ||
| − | | {{sort| | + | | {{sort|1227|1227}} |
| [[Dujianghe Bridge]]<br />都江河特大桥 | | [[Dujianghe Bridge]]<br />都江河特大桥 | ||
| {{ft to m|(361)|abbr=yes|precision=0}} | | {{ft to m|(361)|abbr=yes|precision=0}} | ||
| Line 735: | Line 735: | ||
|- | |- | ||
| [[Image:Qijiapo 3 &1.jpg|100px|link=Qijiapo Number 3 Bridge]] | | [[Image:Qijiapo 3 &1.jpg|100px|link=Qijiapo Number 3 Bridge]] | ||
| − | | {{sort| | + | | {{sort|1228|1228}} |
| [[Qijiapo Number 3 Bridge]]<br />七甲坡3号特大桥 | | [[Qijiapo Number 3 Bridge]]<br />七甲坡3号特大桥 | ||
| {{ft to m|(361)|abbr=yes|precision=0}} | | {{ft to m|(361)|abbr=yes|precision=0}} | ||
| Line 744: | Line 744: | ||
|- | |- | ||
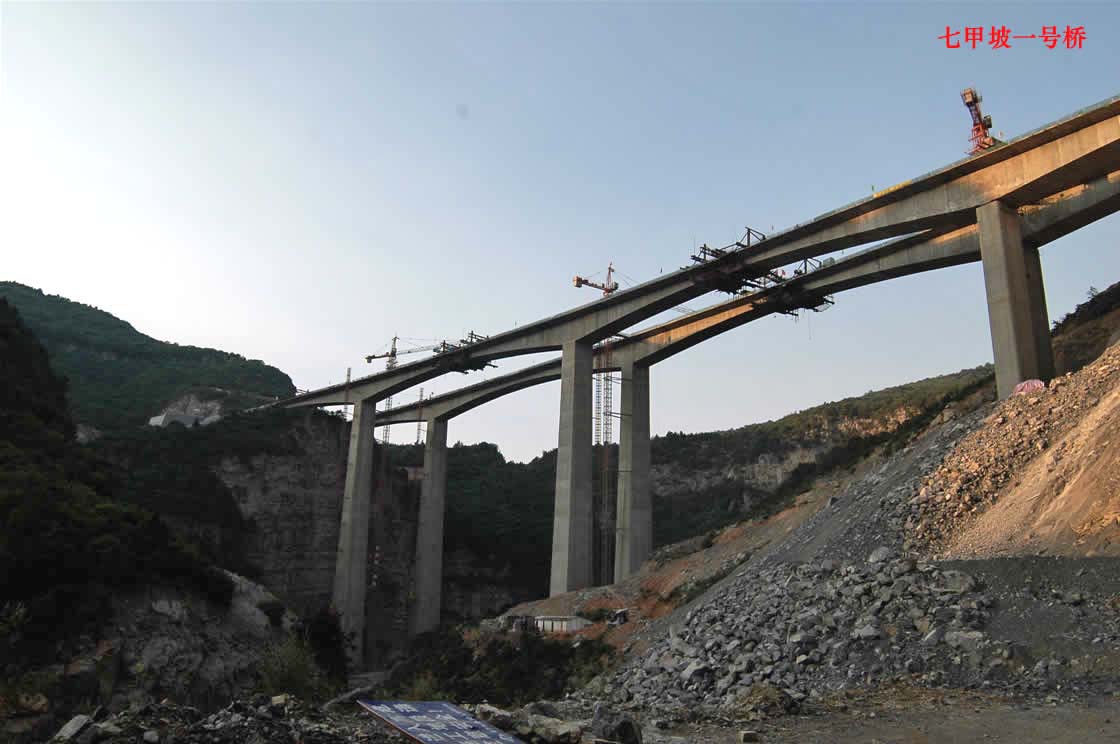
| [[Image:Qijiapo 1 View.jpg|100px|link=Qijiapo Number 1 Bridge]] | | [[Image:Qijiapo 1 View.jpg|100px|link=Qijiapo Number 1 Bridge]] | ||
| − | | {{sort| | + | | {{sort|1229|1229}} |
| [[Qijiapo Number 1 Bridge]]<br />七甲坡1号特大桥 | | [[Qijiapo Number 1 Bridge]]<br />七甲坡1号特大桥 | ||
| {{ft to m|(361)|abbr=yes|precision=0}} | | {{ft to m|(361)|abbr=yes|precision=0}} | ||
| Line 753: | Line 753: | ||
|- | |- | ||
| [[Image:Beiwujia bridge.jpg|100px|link=Beiwujia Bridge]] | | [[Image:Beiwujia bridge.jpg|100px|link=Beiwujia Bridge]] | ||
| − | | {{sort| | + | | {{sort|1230|1230}} |
| [[Beiwujia Bridge]]<br />背武甲大桥 | | [[Beiwujia Bridge]]<br />背武甲大桥 | ||
| {{ft to m|361|abbr=yes|precision=0}} | | {{ft to m|361|abbr=yes|precision=0}} | ||
| Line 762: | Line 762: | ||
|- | |- | ||
| [[Image:SongkanheLonglens.jpg|100px|link=Songkanhe Bridge]] | | [[Image:SongkanheLonglens.jpg|100px|link=Songkanhe Bridge]] | ||
| − | | {{sort| | + | | {{sort|1231|1231}} |
| [[Songkanhe Bridge]]<br />松坎河特大桥 | | [[Songkanhe Bridge]]<br />松坎河特大桥 | ||
| {{ft to m|(361)|abbr=yes|precision=0}} | | {{ft to m|(361)|abbr=yes|precision=0}} | ||
| Line 771: | Line 771: | ||
|- | |- | ||
| [[Image:SongkanNorthLonglens.JPG|100px|link=Songkan Bridge]] | | [[Image:SongkanNorthLonglens.JPG|100px|link=Songkan Bridge]] | ||
| − | | {{sort| | + | | {{sort|1232|1232}} |
| [[Songkan Bridge]]<br />松坎河大桥 | | [[Songkan Bridge]]<br />松坎河大桥 | ||
| {{ft to m|(361)|abbr=yes|precision=0}} | | {{ft to m|(361)|abbr=yes|precision=0}} | ||
| Line 780: | Line 780: | ||
|- | |- | ||
| [[Image:DabaopuConst.jpg|100px|link=Dabaopu Bridge]] | | [[Image:DabaopuConst.jpg|100px|link=Dabaopu Bridge]] | ||
| − | | {{sort| | + | | {{sort|1233|1233}} |
| [[Dabaopu Bridge]]<br />打宝铺大桥 | | [[Dabaopu Bridge]]<br />打宝铺大桥 | ||
| {{ft to m|(361)|abbr=yes|precision=0}} | | {{ft to m|(361)|abbr=yes|precision=0}} | ||
| Line 789: | Line 789: | ||
|- | |- | ||
| [[Image:Xinzhan2.jpg|100px|link=Xinzhan Bridge]] | | [[Image:Xinzhan2.jpg|100px|link=Xinzhan Bridge]] | ||
| − | | {{sort| | + | | {{sort|1234|1234}} |
| [[Xinzhan Bridge]]<br />新站大桥 | | [[Xinzhan Bridge]]<br />新站大桥 | ||
| {{ft to m|(361)|abbr=yes|precision=0}} | | {{ft to m|(361)|abbr=yes|precision=0}} | ||
| Line 798: | Line 798: | ||
|- | |- | ||
| [[Image:Jinzhuwo2Trees.JPG|100px|link=Jinzhuwo Number 2 Bridge]] | | [[Image:Jinzhuwo2Trees.JPG|100px|link=Jinzhuwo Number 2 Bridge]] | ||
| − | | {{sort| | + | | {{sort|1235|1235}} |
| [[Jinzhuwo Number 2 Bridge]]<br />金竹窝II号大桥 | | [[Jinzhuwo Number 2 Bridge]]<br />金竹窝II号大桥 | ||
| {{ft to m|(361)|abbr=yes|precision=0}} | | {{ft to m|(361)|abbr=yes|precision=0}} | ||
| Line 807: | Line 807: | ||
|- | |- | ||
| [[Image:WeijiazhaiWide.jpg|100px|link=Weijiazhai Bridge]] | | [[Image:WeijiazhaiWide.jpg|100px|link=Weijiazhai Bridge]] | ||
| − | | {{sort| | + | | {{sort|1236|1236}} |
| [[Weijiazhai Bridge]]<br />魏家寨特大桥 | | [[Weijiazhai Bridge]]<br />魏家寨特大桥 | ||
| {{ft to m|(361)|abbr=yes|precision=0}} | | {{ft to m|(361)|abbr=yes|precision=0}} | ||
| Line 816: | Line 816: | ||
|- | |- | ||
| [[Image:WanglongbaoArch&Footbridge.jpg|100px|link=Wanlong Bridge]] | | [[Image:WanglongbaoArch&Footbridge.jpg|100px|link=Wanlong Bridge]] | ||
| − | | {{sort| | + | | {{sort|1237|1237}} |
| [[Wanlong Bridge]]<br />湾龙桥 | | [[Wanlong Bridge]]<br />湾龙桥 | ||
| {{ft to m|361|abbr=yes|precision=0}} | | {{ft to m|361|abbr=yes|precision=0}} | ||
| Line 825: | Line 825: | ||
|- | |- | ||
| [[Image:JiankouSatelliteNew.jpg|100px|link=Zhaojiayuan Bridge]] | | [[Image:JiankouSatelliteNew.jpg|100px|link=Zhaojiayuan Bridge]] | ||
| − | | {{sort| | + | | {{sort|1238|1238}} |
| [[Zhaojiayuan Bridge]]<br />赵家塬大桥 | | [[Zhaojiayuan Bridge]]<br />赵家塬大桥 | ||
| {{ft to m|(361)|abbr=yes|precision=0}} | | {{ft to m|(361)|abbr=yes|precision=0}} | ||
| Line 834: | Line 834: | ||
|- | |- | ||
| [[Image:Zhoujiayuan.jpg|100px|link=Zhoujiayuan Bridge]] | | [[Image:Zhoujiayuan.jpg|100px|link=Zhoujiayuan Bridge]] | ||
| − | | {{sort| | + | | {{sort|1239|1239}} |
| [[Zhoujiayuan Bridge]]<br />周家院大桥 | | [[Zhoujiayuan Bridge]]<br />周家院大桥 | ||
| {{ft to m|(361)|abbr=yes|precision=0}} | | {{ft to m|(361)|abbr=yes|precision=0}} | ||
| Line 843: | Line 843: | ||
|- | |- | ||
| [[Image:NanpanjiangComplete.jpg|100px|link=Nanpanjiang Bridge Suomeng]] | | [[Image:NanpanjiangComplete.jpg|100px|link=Nanpanjiang Bridge Suomeng]] | ||
| − | | {{sort| | + | | {{sort|1240|1240}} |
| [[Nanpanjiang Bridge Suomeng]]<br />锁蒙高速公路南盘江特大桥 | | [[Nanpanjiang Bridge Suomeng]]<br />锁蒙高速公路南盘江特大桥 | ||
| {{ft to m|361|abbr=yes|precision=0}} | | {{ft to m|361|abbr=yes|precision=0}} | ||
| Line 852: | Line 852: | ||
|- | |- | ||
| [[Image:Lancangjiang Bridge Shideng.jpg|100px|link=Lancangjiang Bridge Shideng]] | | [[Image:Lancangjiang Bridge Shideng.jpg|100px|link=Lancangjiang Bridge Shideng]] | ||
| − | | {{sort| | + | | {{sort|1241|1241}} |
| [[Lancangjiang Bridge Shideng]]<br />澜沧江石登大桥 | | [[Lancangjiang Bridge Shideng]]<br />澜沧江石登大桥 | ||
| {{ft to m|(361)|abbr=yes|precision=0}} | | {{ft to m|(361)|abbr=yes|precision=0}} | ||
| Line 861: | Line 861: | ||
|- | |- | ||
| [[Image:PaotongwanLonglens.jpg|100px|link=Paotongwan Bridge]] | | [[Image:PaotongwanLonglens.jpg|100px|link=Paotongwan Bridge]] | ||
| − | | {{sort| | + | | {{sort|1242|1242}} |
| [[Paotongwan Bridge]]<br />泡桐湾大桥 | | [[Paotongwan Bridge]]<br />泡桐湾大桥 | ||
| {{ft to m|361|abbr=yes|precision=0}} | | {{ft to m|361|abbr=yes|precision=0}} | ||
| Line 870: | Line 870: | ||
|- | |- | ||
| [[Image:MutucaViaductByGrupoAterpa.jpg|100px|link=Mutuca Viaduct]] | | [[Image:MutucaViaductByGrupoAterpa.jpg|100px|link=Mutuca Viaduct]] | ||
| − | | {{sort| | + | | {{sort|1243|1243}} |
| [[Mutuca Viaduct]]<br />Viaduto Mutuca | | [[Mutuca Viaduct]]<br />Viaduto Mutuca | ||
| {{ft to m|(361)|abbr=yes|precision=0}} | | {{ft to m|(361)|abbr=yes|precision=0}} | ||
| Line 879: | Line 879: | ||
|- | |- | ||
| [[Image:Ulleong FootbridgeTower.jpg|100px|link=Ulleong Sogeumsan Footbridge]] | | [[Image:Ulleong FootbridgeTower.jpg|100px|link=Ulleong Sogeumsan Footbridge]] | ||
| − | | {{sort| | + | | {{sort|1244|1244}} |
| [[Ulleong Sogeumsan Footbridge]]<br />소금산출렁다리 | | [[Ulleong Sogeumsan Footbridge]]<br />소금산출렁다리 | ||
| {{ft to m|(361)|abbr=yes|precision=0}} | | {{ft to m|(361)|abbr=yes|precision=0}} | ||
| Line 888: | Line 888: | ||
|- | |- | ||
| [[Image:NewSouthKoreaExtradosedOpen 2016 copy.jpg|100px|link=Yaro Bridge]] | | [[Image:NewSouthKoreaExtradosedOpen 2016 copy.jpg|100px|link=Yaro Bridge]] | ||
| − | | {{sort| | + | | {{sort|1245|1245}} |
| [[Yaro Bridge]]<br />야로대교 | | [[Yaro Bridge]]<br />야로대교 | ||
| {{ft to m|361|abbr=yes|precision=0}} | | {{ft to m|361|abbr=yes|precision=0}} | ||
| Line 897: | Line 897: | ||
|- | |- | ||
| [[Image:FontaineTruckLoadByCimolai.jpg|100px|link=Fontaine Ravine Viaduct]] | | [[Image:FontaineTruckLoadByCimolai.jpg|100px|link=Fontaine Ravine Viaduct]] | ||
| − | | {{sort| | + | | {{sort|1246|1246}} |
| [[Fontaine Ravine Viaduct]]<br />Viaduc Fontaine Ravine | | [[Fontaine Ravine Viaduct]]<br />Viaduc Fontaine Ravine | ||
| {{ft to m|361|abbr=yes|precision=0}} | | {{ft to m|361|abbr=yes|precision=0}} | ||
| Line 906: | Line 906: | ||
|- | |- | ||
| [[Image:FukatanigawaBridge.jpg|100px|link=Fukatanigawa Bridge]] | | [[Image:FukatanigawaBridge.jpg|100px|link=Fukatanigawa Bridge]] | ||
| − | | {{sort| | + | | {{sort|1247|1247}} |
| [[Fukatanigawa Bridge]]<br />深谷川橋 | | [[Fukatanigawa Bridge]]<br />深谷川橋 | ||
| {{ft to m|361|abbr=yes|precision=0}} | | {{ft to m|361|abbr=yes|precision=0}} | ||
| Line 915: | Line 915: | ||
|- | |- | ||
| [[Image:NijinoView.JPG|100px|link=Nijino Bridge]] | | [[Image:NijinoView.JPG|100px|link=Nijino Bridge]] | ||
| − | | {{sort| | + | | {{sort|1248|1248}} |
| [[Nijino Bridge]]<br />虹の大橋 | | [[Nijino Bridge]]<br />虹の大橋 | ||
| {{ft to m|(361)|abbr=yes|precision=0}} | | {{ft to m|(361)|abbr=yes|precision=0}} | ||
| Line 924: | Line 924: | ||
|- | |- | ||
| [[Image:Kawashimogawa Pier.jpg|100px|link=Kawashimogawa Bridge]] | | [[Image:Kawashimogawa Pier.jpg|100px|link=Kawashimogawa Bridge]] | ||
| − | | {{sort| | + | | {{sort|1249|1249}} |
| [[Kawashimogawa Bridge]]<br />川下川橋 | | [[Kawashimogawa Bridge]]<br />川下川橋 | ||
| {{ft to m|(361)|abbr=yes|precision=0}} | | {{ft to m|(361)|abbr=yes|precision=0}} | ||
| Line 933: | Line 933: | ||
|- | |- | ||
| [[Image:YatsugatakeDrone.jpg|100px|link=Yatsugatake Kogen Bridge]] | | [[Image:YatsugatakeDrone.jpg|100px|link=Yatsugatake Kogen Bridge]] | ||
| − | | {{sort| | + | | {{sort|1250|1250}} |
| [[Yatsugatake Kogen Bridge]]<br />八ヶ岳高原大橋 | | [[Yatsugatake Kogen Bridge]]<br />八ヶ岳高原大橋 | ||
| {{ft to m|(361)|abbr=yes|precision=0}} | | {{ft to m|(361)|abbr=yes|precision=0}} | ||
| Line 942: | Line 942: | ||
|- | |- | ||
| [[Image:1ColleIsarcoView.jpg|100px|link=Colle Isarco Viaduct]] | | [[Image:1ColleIsarcoView.jpg|100px|link=Colle Isarco Viaduct]] | ||
| − | | {{sort| | + | | {{sort|1251|1251}} |
| [[Colle Isarco Viaduct]]<br />Viadotto Colle Isarco <br />Gossensass Bridge <br />Viadotto Gossensass | | [[Colle Isarco Viaduct]]<br />Viadotto Colle Isarco <br />Gossensass Bridge <br />Viadotto Gossensass | ||
| {{ft to m|361|abbr=yes|precision=0}} | | {{ft to m|361|abbr=yes|precision=0}} | ||
| Line 951: | Line 951: | ||
|- | |- | ||
| [[Image:FarmaPonteForThumbnail.jpg|100px|link=Farma Viaduct]] | | [[Image:FarmaPonteForThumbnail.jpg|100px|link=Farma Viaduct]] | ||
| − | | {{sort| | + | | {{sort|1252|1252}} |
| [[Farma Viaduct]]<br />Viadotto Farma <br />Petriolo Viaduct <br />Viadotto Petriolo | | [[Farma Viaduct]]<br />Viadotto Farma <br />Petriolo Viaduct <br />Viadotto Petriolo | ||
| {{ft to m|(361)|abbr=yes|precision=0}} | | {{ft to m|(361)|abbr=yes|precision=0}} | ||
| Line 960: | Line 960: | ||
|- | |- | ||
| [[Image:FarmaByANAS.JPG|100px|link=New Farma Viaduct]] | | [[Image:FarmaByANAS.JPG|100px|link=New Farma Viaduct]] | ||
| − | | {{sort| | + | | {{sort|1253|1253}} |
| [[New Farma Viaduct]]<br />Nuovo Viadotto Farma <br />New Petriolo Viaduct <br />Nuovo Viadotto Petriolo | | [[New Farma Viaduct]]<br />Nuovo Viadotto Farma <br />New Petriolo Viaduct <br />Nuovo Viadotto Petriolo | ||
| {{ft to m|(361)|abbr=yes|precision=0}} | | {{ft to m|(361)|abbr=yes|precision=0}} | ||
Revision as of 21:56, 8 December 2023
1-100 | 101-200 | 201-300 | 301-400 | 401-500 | 501-600 | 601-700 | 701-800 | 801-900 | 901-1000
1001-1100 | 1101-1200 | 1201-1300 | 1301-1400 | 1401-1500 | 1501-1600 | 1601-1700 | 1701-1800 | 1801-1900 | 1901-2000
2001-2100 | 2101-2200 | 2201-2300 | 2301-2400 | 2401-2500 | 2501-2600 | 2601-2700 | 2701-2800 | 2801-2900 | 2901-3000
1001-1100 | 1101-1200 | 1201-1300 | 1301-1400 | 1401-1500 | 1501-1600 | 1601-1700 | 1701-1800 | 1801-1900 | 1901-2000
2001-2100 | 2101-2200 | 2201-2300 | 2301-2400 | 2401-2500 | 2501-2600 | 2601-2700 | 2701-2800 | 2801-2900 | 2901-3000
| Rank | Name | Height (meters / feet) | Main Span Length (meters / feet) |
Completed | Location | Country | |
|---|---|---|---|---|---|---|---|
|
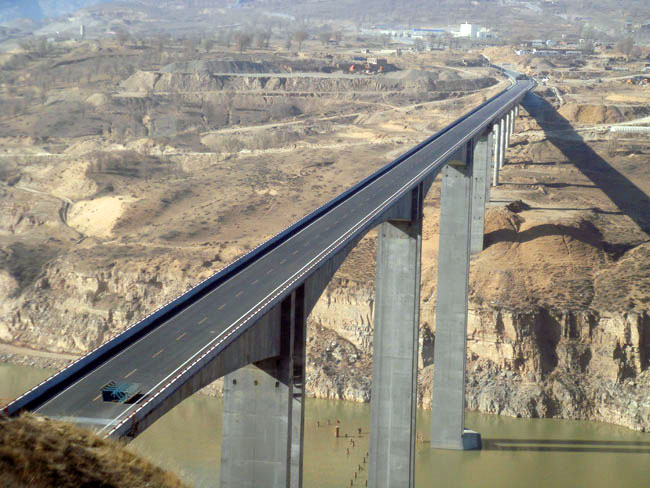
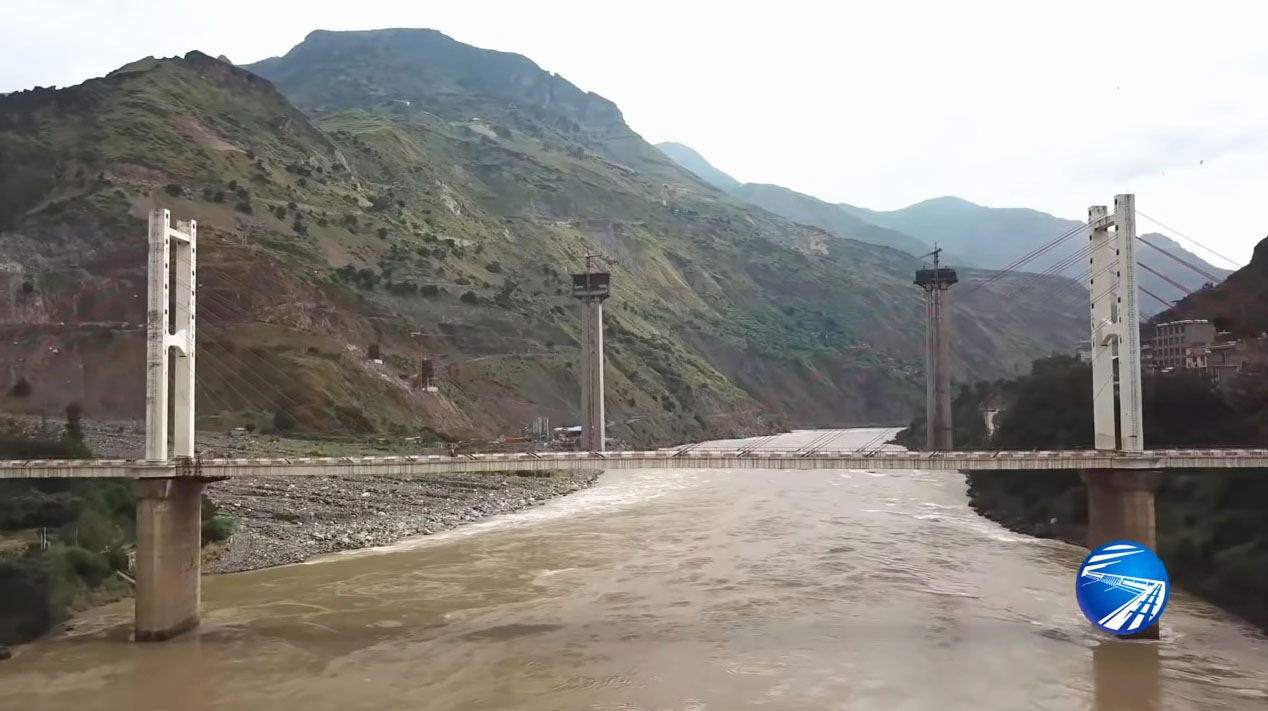
1147 | Huanghe Bridge Xiaoshawan 小沙湾黄河大桥 |
(377) feet 115 meters |
525 feet 160 meters |
2013 | Junggar, Inner Mongolia | China |
|
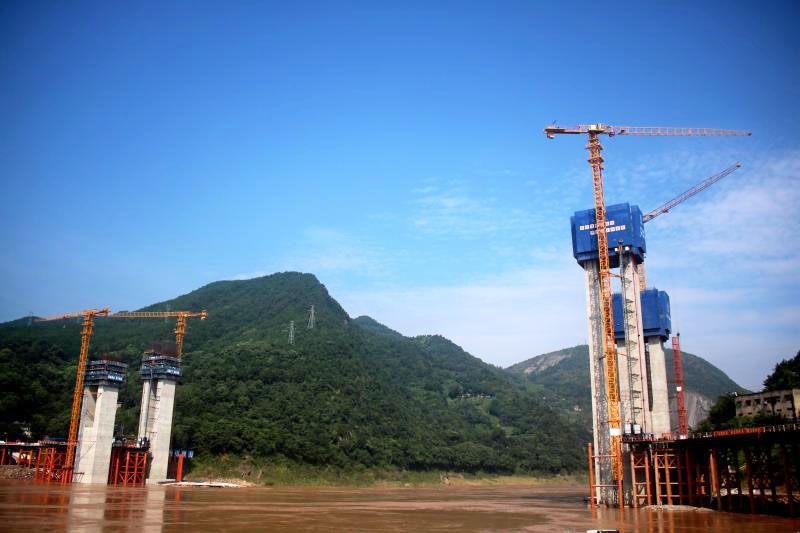
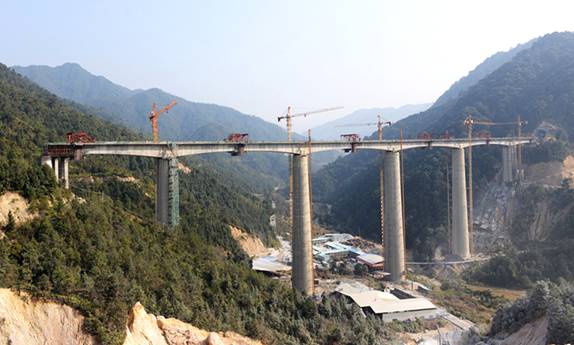
1148 | Jialingjiang Bridge Guanyinxia 观音峡嘉陵江特大桥 |
(377) feet 115 meters |
771 feet 235 meters |
2023 | Beibei, Chongqing | China |
|
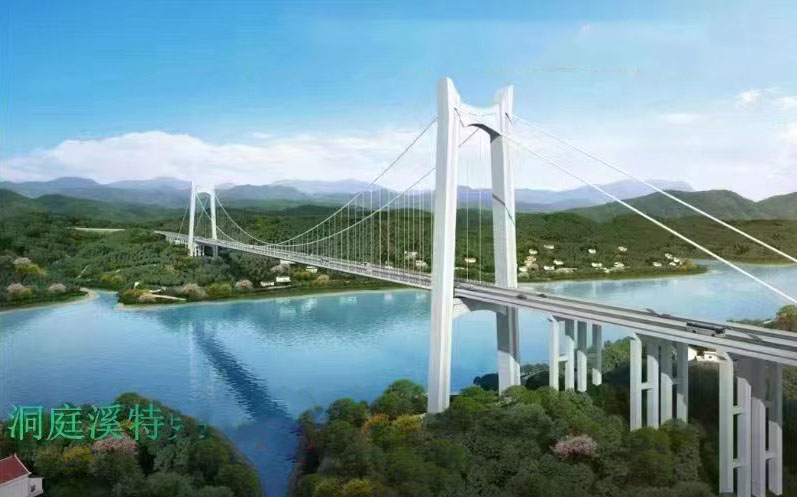
1149 | Dongting River Yuanshui Bridge 洞庭溪沅水特大桥 |
(377) feet 115 meters |
2,625 feet 800 meters |
2024 | Yuanling, Hunan | China |
|
1150 | Maituwan Railway Bridge 麦土湾双线特大桥 |
(377) feet 115 meters |
(262) feet 80 meters |
2024 | Jiangjiazhen, Chongqing | China |
|
1151 | Luohe Bridge Liangmucun 良木村洛河特大桥 |
(377) feet 115 meters |
(394) feet 120 meters |
2024 | Lushi, Henan | China |
|
1152 | Dajianjiao Bridge 大见角大桥 |
377 feet 115 meters |
312 feet 95 meters |
2023 | Tongzi, Guizhou | China |
|
1153 | Heimugou Bridge 洛川黑木沟大桥 |
(377) feet 115 meters |
558 feet 170 meters |
2018 | Luochuan, Shaanxi | China |
|
1154 | Dayuhe Bridge 大浴河特大桥 |
(377) feet 115 meters |
394 feet 120 meters |
2020 | Heyang, Shaanxi | China |
|
1155 | Xushuihe Bridge Hetong 合铜高速徐水沟特大桥 |
(377) feet 115 meters |
394 feet 120 meters |
2020 | Heyang, Shaanxi | China |
|
1156 | Jianxi Bridge 涧西大桥 |
(377) feet 115 meters |
164 feet 50 meters |
2020 | Mianchi, Henan | China |
|
1157 | Sishang Bridge 寺上大桥 |
(377) feet 115 meters |
(164) feet 50 meters |
2020 | Mianchi, Henan | China |
|
1158 | Qiaomalinchang #1 Bridge 巧马林场1号大桥 |
377 feet 115 meters |
394 feet 120 meters |
2012, 2016 | Ceheng, Guizhou | China |
|
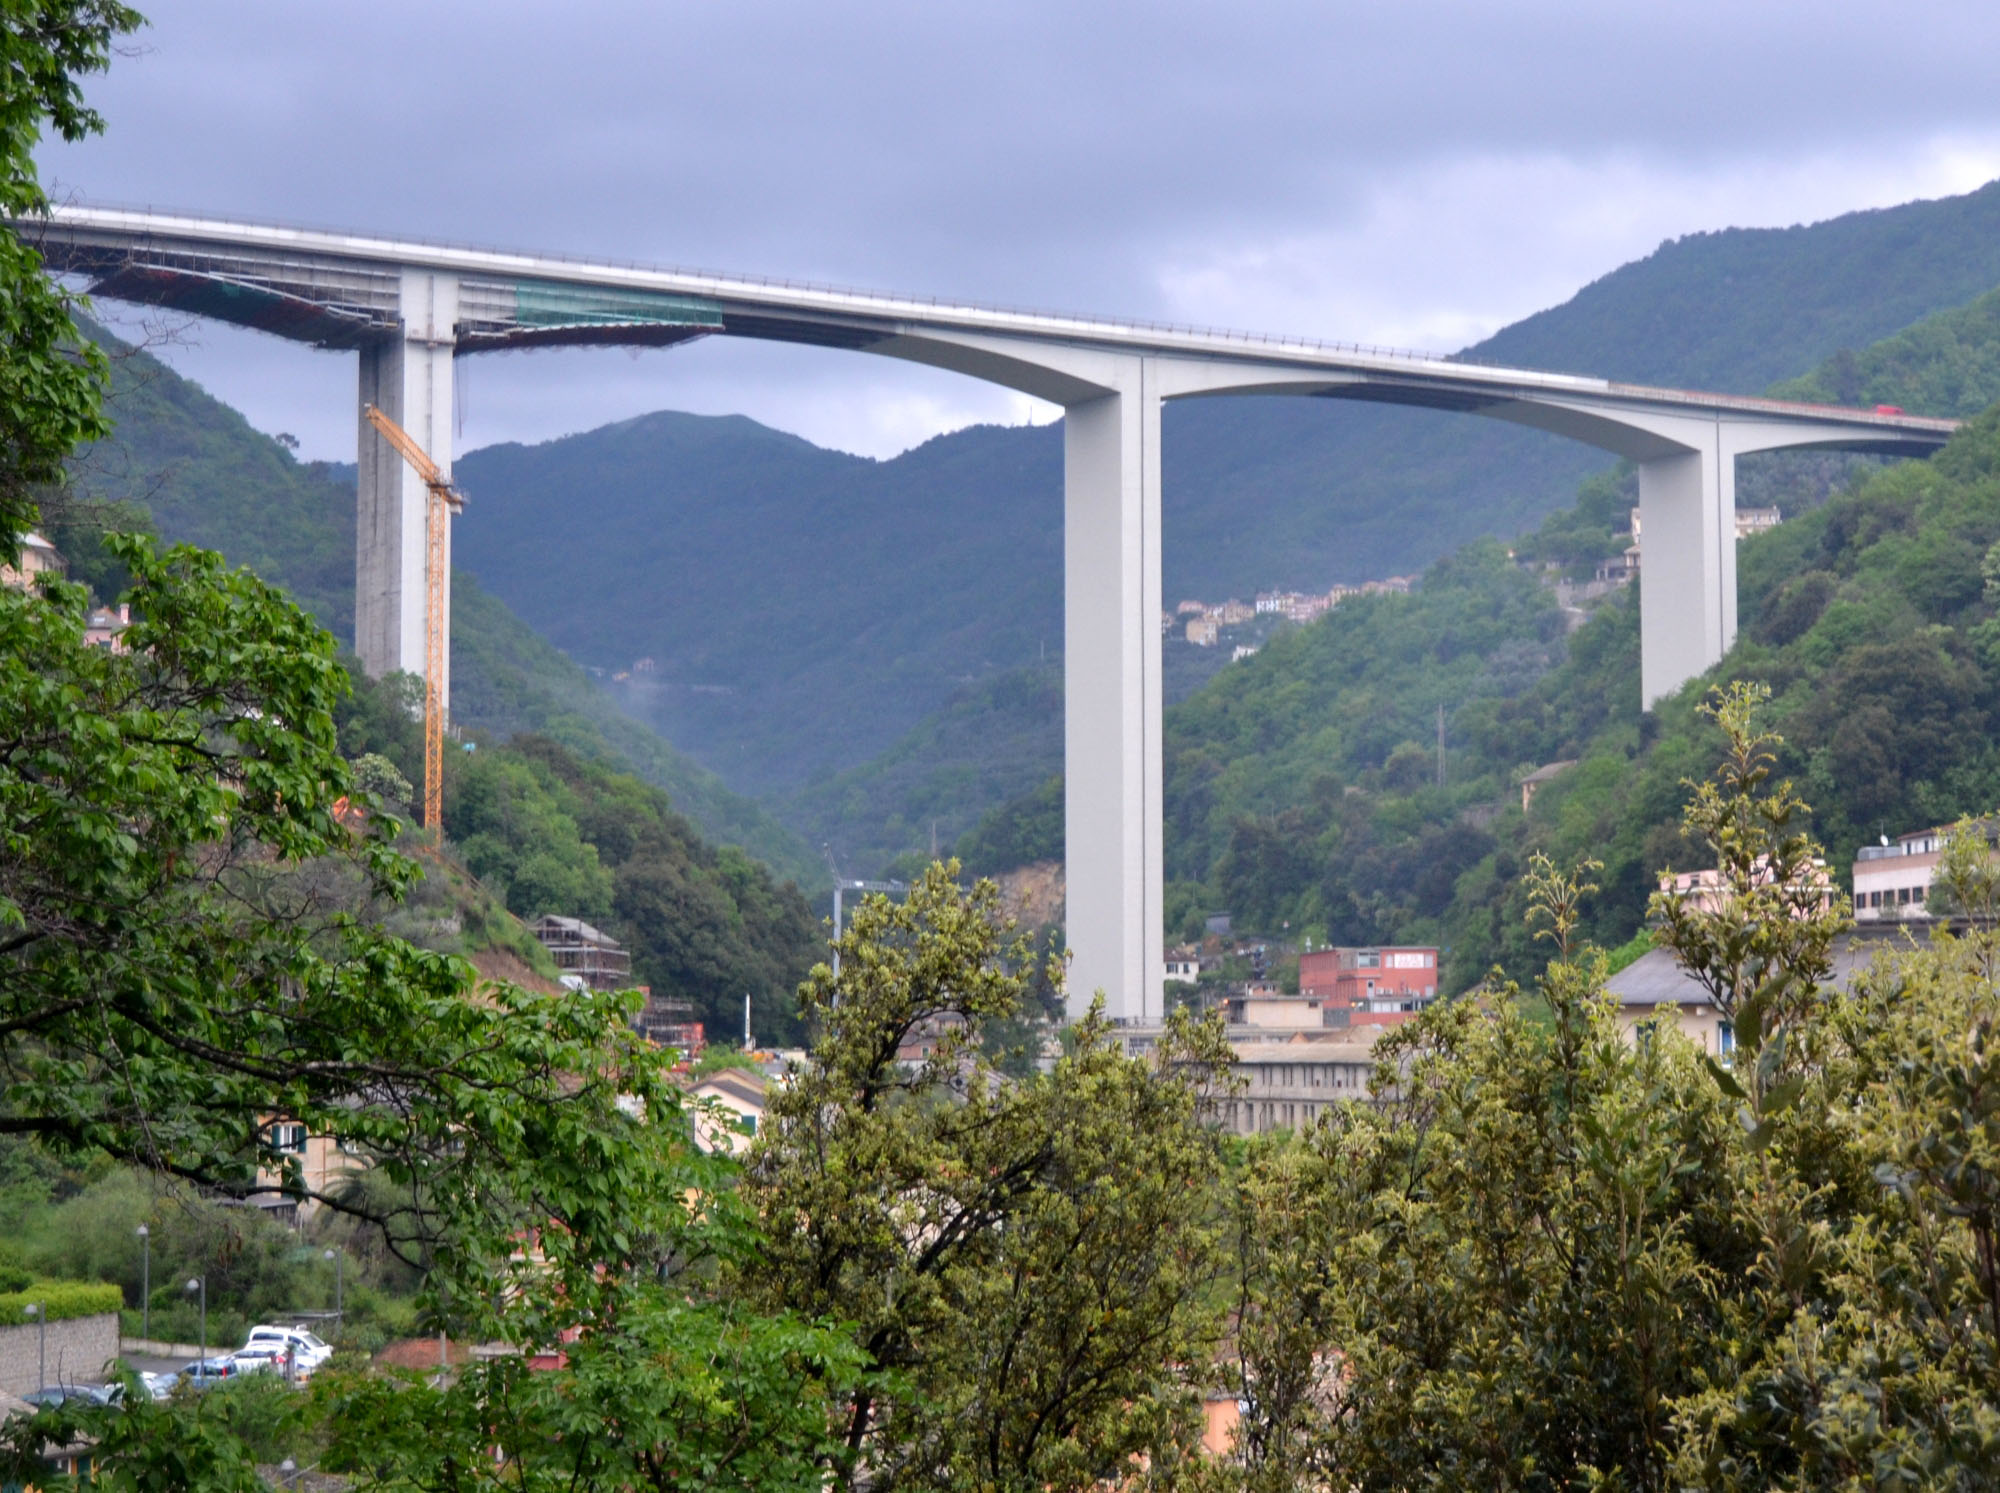
1159 | Sori Bridge Ponte Sori |
377 feet 115 meters |
328 feet 100 meters |
1969 | Sori, Liguria | Italy |
|
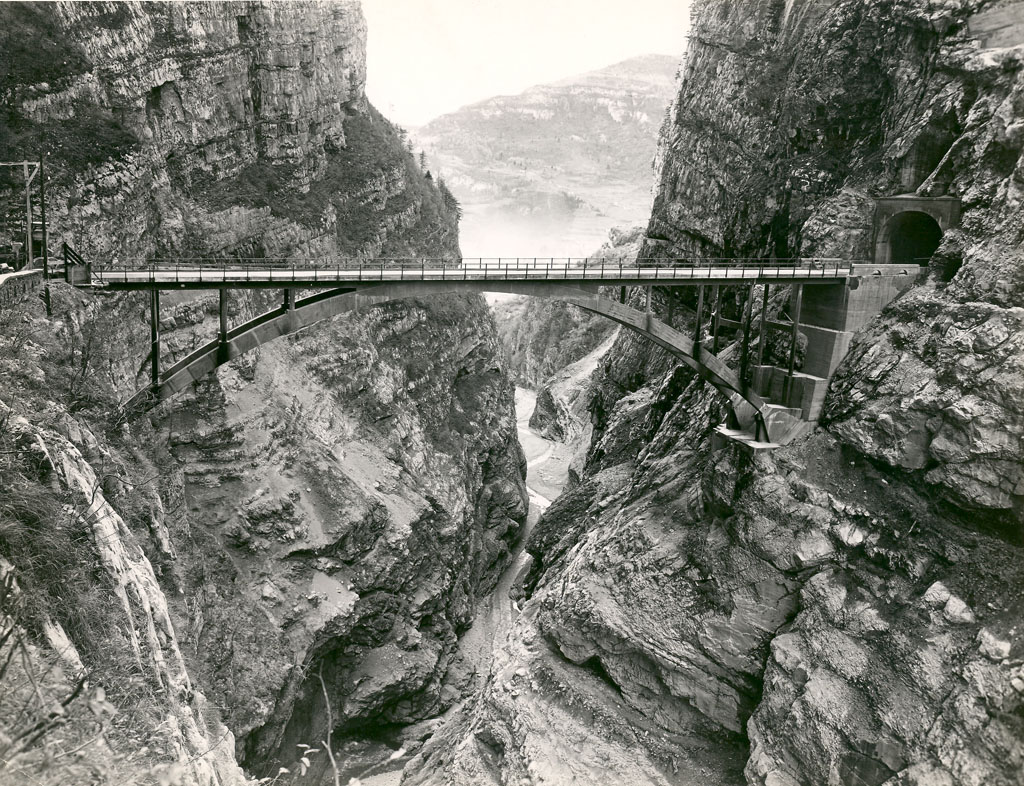
1160 | Vajont Bridge Ponte Vajont |
377 feet 115 meters |
180 feet 55 meters |
1956-1963 | Longarone, Veneto | Italy |

|
1161 | Ricobayo Viaduct Viaducto Ricobayo |
(377) feet 115 meters |
551 feet 168 meters |
1996 | Ricobayo, Castilla y León | Spain |
| 1162 | Mentue Bridge Pont sur la Mentue |
377 feet 115 meters |
492 feet 150 meters |
1999 | Yverdon-les-Bains, Vaud | Switzerland | |
|
1163 | Lignon Viaduct Viaduc Lignon |
(377) feet 115 meters |
328 feet 100 meters |
1993 | Pont-du-Lignon, Auvergne | France |
|
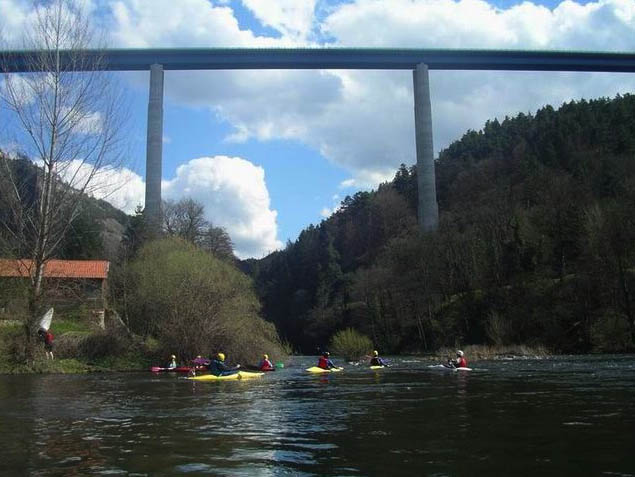
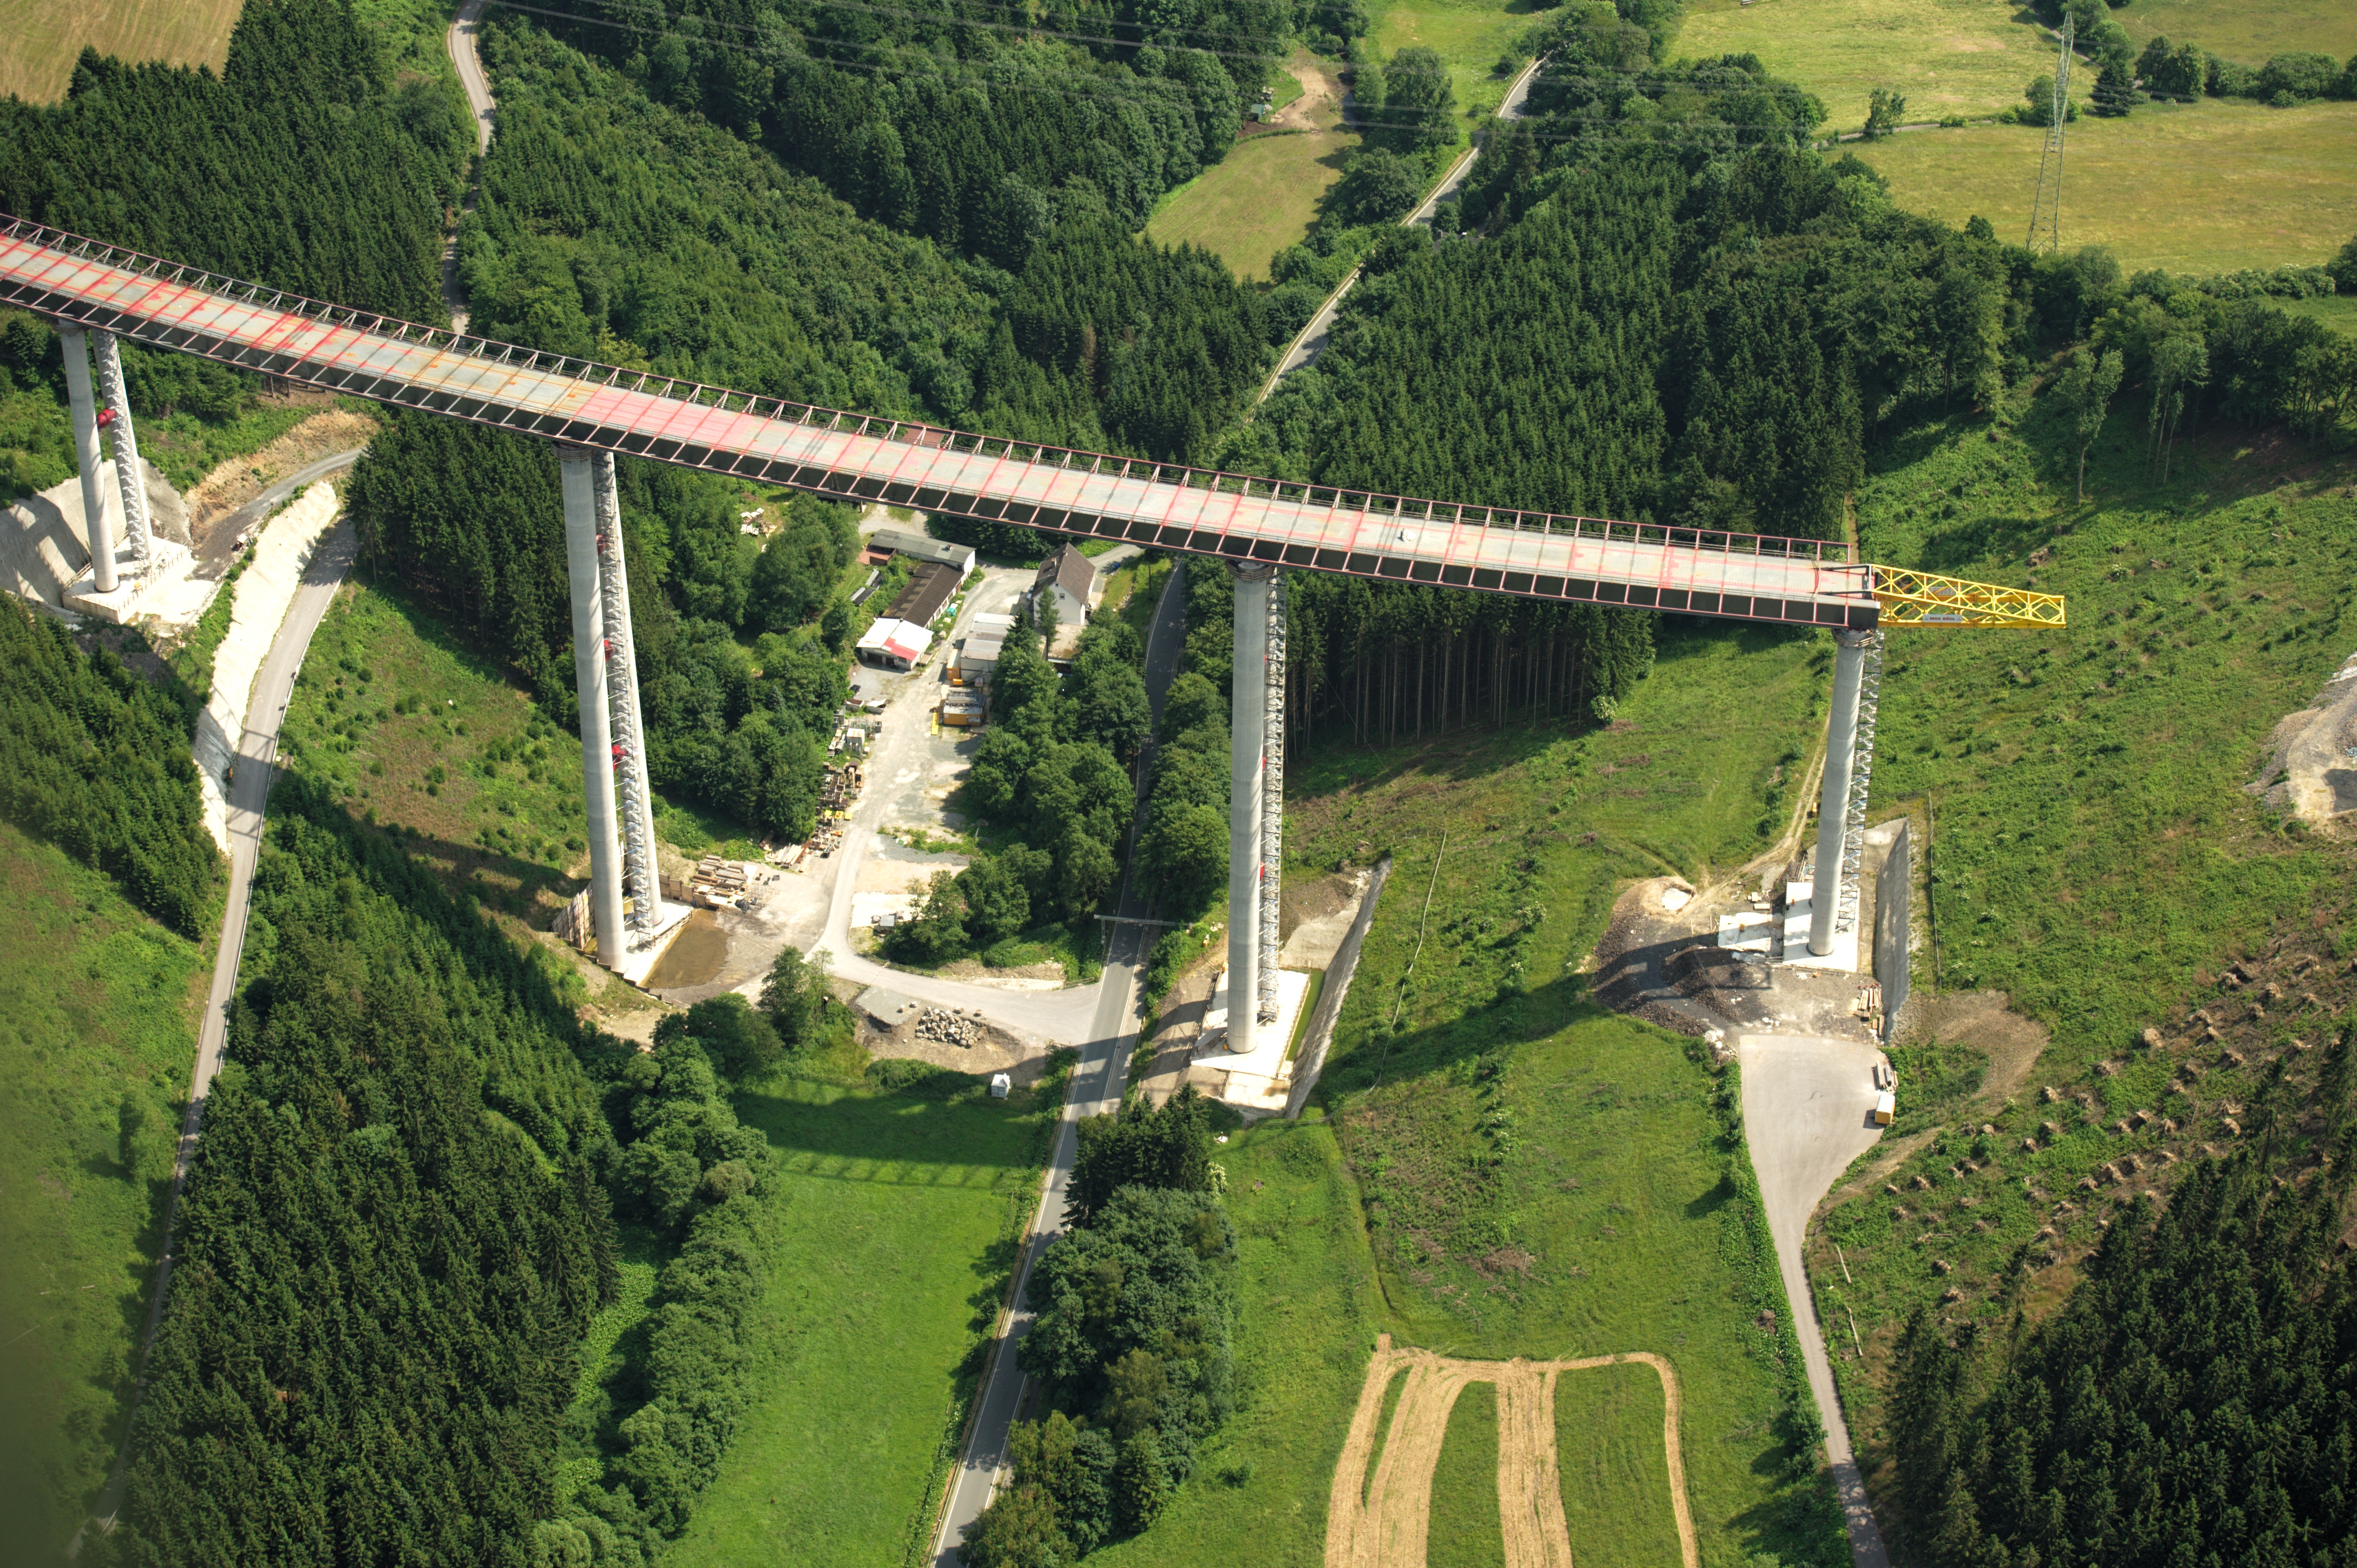
1164 | Nuttlar Bridge Nuttlar Brücke |
(377) feet 115 meters |
377 feet 115 meters |
2019 | Nuttlar, Bestwig | Germany |
|
1165 | Shintotakachiho Bridge 神都高千穂大橋 |
377 feet 115 meters |
469 feet 143 meters |
2003 | Takachiho, Miyazaki | Japan |
|
1166 | Shiyui Bridge 思惟大橋 |
377 feet 115 meters |
607 feet 185 meters |
1984 | Tanohata, Iwate | Japan |
|
1167 | Aoba Bridge 青葉大橋 |
377 feet 115 meters |
591 feet 180 meters |
1996 | Takachiho, Miyazaki | Japan |
|
1168 | Duliujiang Bridge Number 1 都柳江一号大桥 |
(377) feet 115 meters |
492 feet 150 meters |
2010 | Rongjiang, Guizhou | China |
|
1169 | Beipanjiang Bridge Fade 北盘江桥 |
377 feet 115 meters |
492 feet 150 meters |
1995 | Huangjiazhai, Guizhou | China |
|
1170 | Stalden Bridge Pont Stalden Merjubrigga Stalden |
377 feet 115 meters |
(218) feet 66 meters |
1930 | Stalden, Valais | Switzerland |
|
1171 | Babina Bridge Babina Rijeka |
377 feet 115 meters |
547 feet 167 meters |
2020 | Zenica | Bosnia and Herzegovina |
|
1172 | Wanzhou Yangtze River Bridge Number 2 万州长江二桥 |
374 feet 114 meters |
1,903 feet 580 meters |
2004 | Wanzhou, Chongqing | China |

|
1173 | Mengzhai Bridge 孟寨大桥 |
(377) feet 115 meters |
771 feet 235 meters |
2009 | Qinglong, Guizhou | China |
|
1174 | Qinglongzui Bridge 青龙咀大桥 |
377 feet 115 meters |
394 feet 120 meters |
2018 | Bailinzhen, Chongqing | China |
|
1175 | Wolonggou Number 4 Bridge 卧龙沟4号特大桥 |
(377) feet 115 meters |
131 feet 40 meters |
2018 | Yinjizhen, Gansu | China |
|
1176 | Baishuihe S209 Bridge 白水河大桥 |
(377) feet 115 meters |
459 feet 140 meters |
2020 | Baishui, Shaanxi | China |
|
1177 | Jinshajiang Bridge Luoguo 倮果金沙江特大桥 |
377 feet 115 meters |
755 feet 230 meters |
2013 | Panzhihua, Sichuan | China |
|
1178 | Baijianhe Bridge 白涧河特大桥 |
(377) feet 115 meters |
443 feet 135 meters |
2009 | Jiyuan, Henan | China |
|
1179 | Taoyuan Bridge 桃园大桥 |
(377) feet 115 meters |
328 feet 100 meters |
2015 | Sixianzhen, Shaanxi | China |
|
1180 | Litou Bridge 利头大桥 |
(377) feet 115 meters |
(492) feet 150 meters |
2021 | Xingyi, Guizhou | China |
|
1181 | Gutonggou Bridge 古铜沟大桥 |
(377) feet 115 meters |
443 feet 135 meters |
2009 | Jiyuan, Henan | China |
|
1182 | Xuefenghu Bridge 雪峰湖特大桥 |
(377) feet 115 meters |
1,640 feet 500 meters |
2023 | Anhua, Hunan | China |
|
1183 | Daqingshan Glass Footbridge 大青山玻璃吊桥 |
(377) feet 115 meters |
(1,476) feet 450 meters |
2019 | Shangyi, Hebei | China |
|
1184 | Ganhuaxi Bridge 感化溪特大桥 |
(374) feet 114 meters |
394 feet 120 meters |
2013 | Longyan, Fujian | China |
|
1185 | Lucixi Bridge 路磁溪大桥 |
(374) feet 114 meters |
427 feet 130 meters |
2013 | Gandezhen, Fujian | China |
|
1186 | Yijuhe Bridge 宜居河大桥 |
374 feet 114 meters |
377 feet 115 meters |
2016 | Tongguxiang, Chongqing | China |
|
1187 | Larzenbach Bridge Talübergang Larzenbach |
375 feet 114 meters |
230 feet 70 meters |
1979 | Hüttau, Salzburg | Austria |
|
1188 | Fengshihe Bridge 逢石河特大桥 |
(374) feet 114 meters |
(400) feet 122 meters |
2008 | Jiyuan, Henan | China |
|
1189 | Highline 179 Footbridge |
374 feet 114 meters |
1,319 feet 402 meters |
2014 | Reutte, Tyrol | Austria |
|
1190 | Mameyaki Bridge 豆焼き橋 |
371 feet 113 meters |
491 feet 150 meters |
1982 | Otaki, Saitama | Japan |
|
1191 | Tenoya Viaduct Viaducto Tenoya |
371 feet 113 meters |
420 feet 128 meters |
2013 | Tenoya, Gran Canaria Island | Spain |
|
1192 | Feilong Bridge 飞龙大桥 |
371 feet 113 meters |
(427) feet 130 meters |
2002 | Pangjiejiangyu, Yunnan | China |

|
1193 | Huangjiagou Bridge 黄家沟大桥 |
371 feet 113 meters |
459 feet 140 meters |
2014 | Yanchixiang, Shaanxi | China |
|
1194 | Yinchanggou Bridge 银长沟大桥 |
371 feet 113 meters |
(361) feet 110 meters |
2016 | Longchangzhen, Guizhou | China |
|
1195 | Chengmendong Bridge 城门洞大桥 |
371 feet 113 meters |
361 feet 110 meters |
2007 | Panzhihua, Sichuan | China |
|
1196 | Qingquba Bridge 青曲坝大桥 |
371 feet 113 meters |
394 feet 120 meters |
2016 | Jingjiaoxiang, Guizhou | China |
|
1197 | Lewiston-Queenston Bridge |
370 feet 113 meters |
1,000 feet 305 meters |
1962 | Lewiston, New York | United States |
|
1198 | Hoffstadt Creek Bridge |
370 feet 113 meters |
600 feet 183 meters |
1991 | Saint Helens, Washington | United States |
|
1199 | Marques Railway Bridge Puente del Marques |
367 feet 112 meters |
498 feet 152 meters |
1937 | Casilda, Michoacán | Mexico |
|
1200 | Fausto Bisantis Bridge Ponte Fausto Bisantis Fiumarella Bridge Ponte Fiumarella |
367 feet 112 meters |
758 feet 231 meters |
1962 | Catanzaro, Calabria | Italy |

|
1201 | Malinghe Bridge One 马岭河大桥 |
367 feet 112 meters |
499 feet 152 meters |
2016 | Xingyi, Guizhou | China |
|
1202 | Bagu Bridge 坝固特大桥 |
367 feet 112 meters |
(492) feet 150 meters |
2021 | Baguzhen, Guizhou | China |
|
1203 | Shizijinghe Bridge 石滓经河大桥 |
367 feet 112 meters |
459 feet 140 meters |
2012 | Yingjing, Sichuan | China |
|
1204 | Jinshajiang Bridge Jiaopingdu 皎平渡金沙江大桥 |
367 feet 112 meters |
722 feet 220 meters |
2019 | Huili, Sichuan | China |
|
1205 | Jiangjinshan Railway Bridge 将金山特大桥 |
367 feet 112 meters |
328 feet 100 meters |
2014 | Gutianzhen, Fujian | China |
|
1206 | Zhenzhu Bridge 珍珠大桥 |
367 feet 112 meters |
394 feet 120 meters |
2008 | Wuchuan, Guizhou | China |
|
1207 | Jiutian Bridge 九天大桥 |
(367) feet 112 meters |
(328) feet 100 meters |
2018 | Wuchuan, Guizhou | China |
|
1208 | Lianhu Bridge 连湖大桥 |
367 feet 112 meters |
427 feet 130 meters |
2020 | Lianhuzhen, Chongqing | China |
|
1209 | High Steel Bridge South Fork Skokomish River |
365 feet 111 meters |
366 feet 112 meters |
1929 | Shelton, Washington | United States |
|
1210 | Niujiaoping Railway Bridge 牛角坪特大桥 |
364 feet 111 meters |
630 feet 192 meters |
2009 | Ziyang, Shaanxi | China |
|
1211 | Yunihe Bridge 淤泥河桥 |
364 feet 111 meters |
525 feet 160 meters |
2006 | Huangling, Shaanxi | China |
|
1212 | Qishui Bridge 淇水大桥 |
364 feet 111 meters |
295 feet 90 meters |
2013 | Rucheng, Hunan | China |
|
1213 | Chuanba Bridge 川坝大桥 |
364 feet 111 meters |
459 feet 140 meters |
2025 | Panjiangzhen, Guizhou | China |

|
1214 | Leiternweide Footbridge Hängebrücke Leiternweide |
364 feet 111 meters |
364 feet 111 meters |
2015 | Weissenburg, Bern | Switzerland |
|
1215 | Puan Bridge Number 1 普安1号大桥 |
(364) feet 111 meters |
(492) feet 150 meters |
2009 | Pu'an, Guizhou | China |
|
1216 | Quetzalapa Bridge Puente Quetzalapa |
(361) feet 110 meters |
700 feet 213 meters |
1993 | Quetzalapa, Guerrero | Mexico |
|
1217 | Holzgau Footbridge Hängebrücke Holzgau |
361 feet 110 meters |
656 feet 200 meters |
2012 | Holzgau, Tyrol | Austria |
|
1218 | Changxi Bridge 厂溪特大桥 |
(361) feet 110 meters |
591 feet 180 meters |
2012 | Changxixiang, Sichuan | China |
|
1219 | Sanchaxi Bridge 三插溪特大桥 |
(361) feet 110 meters |
558 feet 170 meters |
2022 | Jingning, Zhejiang | China |
|
1220 | Dashitian Bridge 大石田特大桥 |
361 feet 110 meters |
394 feet 120 meters |
2021 | Enping, Guangdong | China |
|
1221 | Hongshishan Bridge 红石山大桥 |
(361) feet 110 meters |
394 feet 120 meters |
2021 | Enping, Guangdong | China |
|
1222 | Shihuiyaogou Bridge S303 石灰窑沟大桥 |
(361) feet 110 meters |
443 feet 135 meters |
2021 | Qiaojia, Yunnan | China |
|
1223 | Yuantou Reservoir Bridge 源头水库特大桥 |
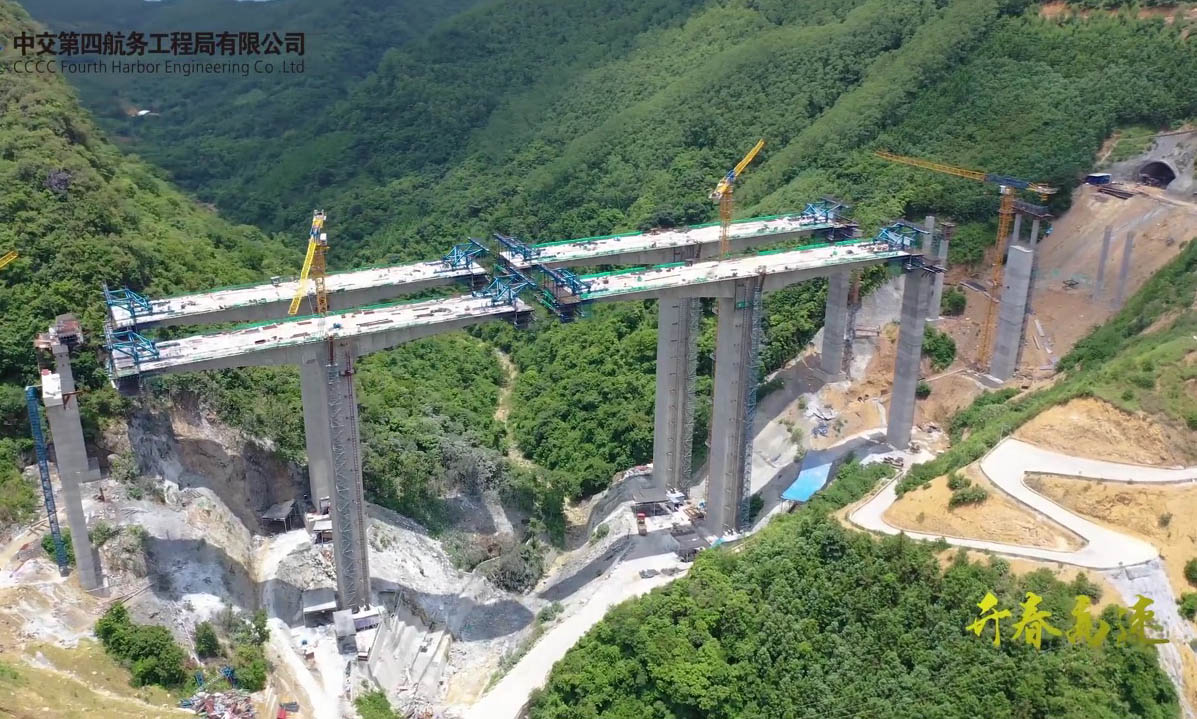
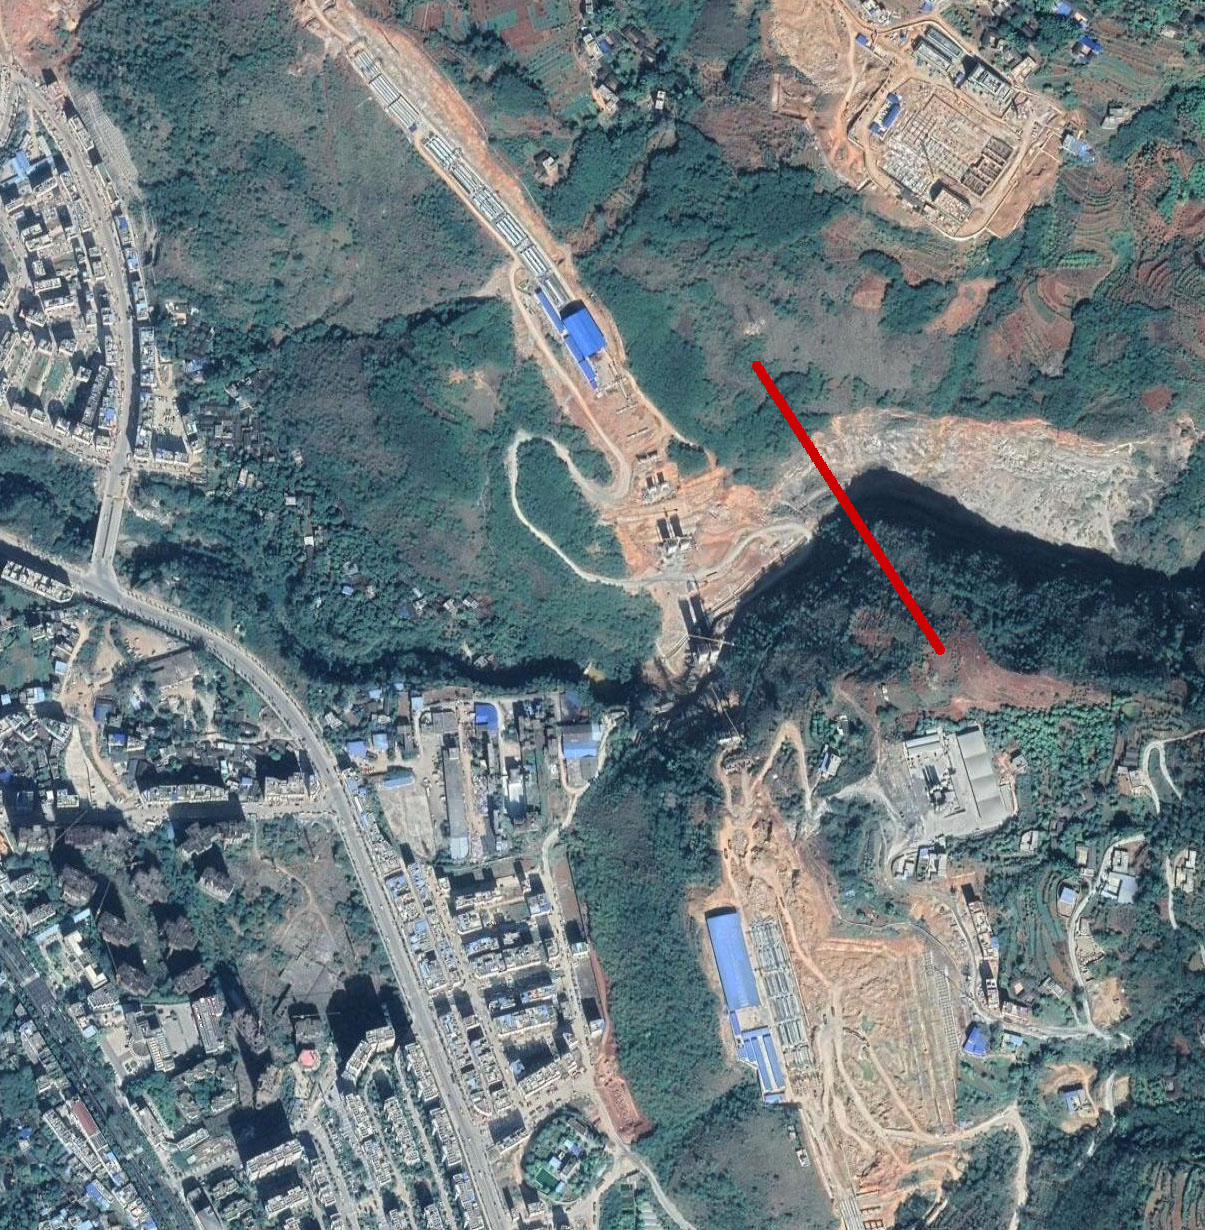
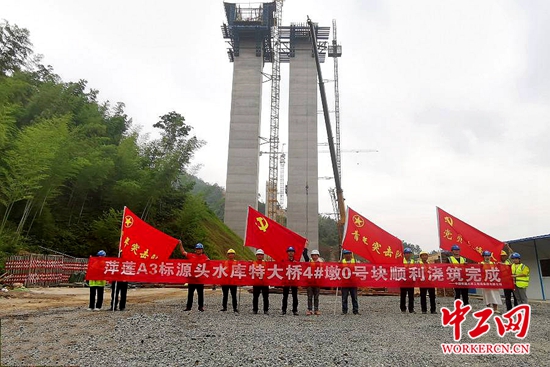
(361) feet 110 meters |
525 feet 160 meters |
2022 | Pingxiang, Jiangxi | China |
| 1224 | Niulanjiang Bridge Duxiang 都香高速牛栏江特大桥 |
(361) feet 110 meters |
584 feet 178 meters |
2022 | Jinyang, Sichuan | China | |
|
1225 | Shenchuan Bridge 神川大桥 |
361 feet 110 meters |
(400) feet 122 meters |
2004 | Qiaotou, Yunnan | China |
|
1226 | Xigou Bridge 西沟大桥 |
(361) feet 110 meters |
427 feet 130 meters |
2009 | Jincheng, Shanxi | China |
|
1227 | Dujianghe Bridge 都江河特大桥 |
(361) feet 110 meters |
361 feet 110 meters |
2019 | Sandu, Guizhou | China |
|
1228 | Qijiapo Number 3 Bridge 七甲坡3号特大桥 |
(361) feet 110 meters |
558 feet 170 meters |
2009 | Jincheng, Shanxi | China |
|
1229 | Qijiapo Number 1 Bridge 七甲坡1号特大桥 |
(361) feet 110 meters |
377 feet 115 meters |
2009 | Jincheng, Shanxi | China |
|
1230 | Beiwujia Bridge 背武甲大桥 |
361 feet 110 meters |
131 feet 40 meters |
2016 | Panxian, Guizhou | China |
|
1231 | Songkanhe Bridge 松坎河特大桥 |
(361) feet 110 meters |
492 feet 150 meters |
2022 | Ganshuizhen, Chongqing | China |
|
1232 | Songkan Bridge 松坎河大桥 |
(361) feet 110 meters |
(443) feet 135 meters |
2021 | Songkanzhen, Guizhou | China |

|
1233 | Dabaopu Bridge 打宝铺大桥 |
(361) feet 110 meters |
(492) feet 150 meters |
2022 | Songkanzhen, Guizhou | China |
|
1234 | Xinzhan Bridge 新站大桥 |
(361) feet 110 meters |
(492) feet 150 meters |
2022 | Xinzhanzhen, Guizhou | China |
|
1235 | Jinzhuwo Number 2 Bridge 金竹窝II号大桥 |
(361) feet 110 meters |
(443) feet 135 meters |
2022 | Dahezhen, Guizhou | China |
|
1236 | Weijiazhai Bridge 魏家寨特大桥 |
(361) feet 110 meters |
(525) feet 160 meters |
2022 | Puchangzhen, Guizhou | China |
|
1237 | Wanlong Bridge 湾龙桥 |
361 feet 110 meters |
82 feet 25 meters |
2013 | Fa’er Bouyei, Guizhou | China |
|
1238 | Zhaojiayuan Bridge 赵家塬大桥 |
(361) feet 110 meters |
459 feet 140 meters |
2011 | Qianyang, Shaanxi | China |
|
1239 | Zhoujiayuan Bridge 周家院大桥 |
(361) feet 110 meters |
131 feet 40 meters |
2014 | Fuquan, Guizhou | China |
|
1240 | Nanpanjiang Bridge Suomeng 锁蒙高速公路南盘江特大桥 |
361 feet 110 meters |
591 feet 180 meters |
2013 | Kaiyuan, Yunnan | China |
|
1241 | Lancangjiang Bridge Shideng 澜沧江石登大桥 |
(361) feet 110 meters |
920 feet 280 meters |
2015 | Shidengxiang, Yunnan | China |
|
1242 | Paotongwan Bridge 泡桐湾大桥 |
361 feet 110 meters |
295 feet 90 meters |
2016 | Zhaotong, Yunnan | China |
|
1243 | Mutuca Viaduct Viaduto Mutuca |
(361) feet 110 meters |
(459) feet 140 meters |
???? | Belo Horizonte, Minas Gerais | Brazil |
|
1244 | Ulleong Sogeumsan Footbridge 소금산출렁다리 |
(361) feet 110 meters |
1,325 feet 404 meters |
2022 | Wonju, Gangwon | South Korea |
|
1245 | Yaro Bridge 야로대교 |
361 feet 110 meters |
623 feet 190 meters |
2016 | Yaro-myeon, Gyeongsangnam | South Korea |
|
1246 | Fontaine Ravine Viaduct Viaduc Fontaine Ravine |
361 feet 110 meters |
558 feet 170 meters |
2009 | La Chaloupe St-Leu, Réunion Island | France |
|
1247 | Fukatanigawa Bridge 深谷川橋 |
361 feet 110 meters |
426 feet 130 meters |
1982 | Nishikimachiusago, Yamaguchi | Japan |
|
1248 | Nijino Bridge 虹の大橋 |
(361) feet 110 meters |
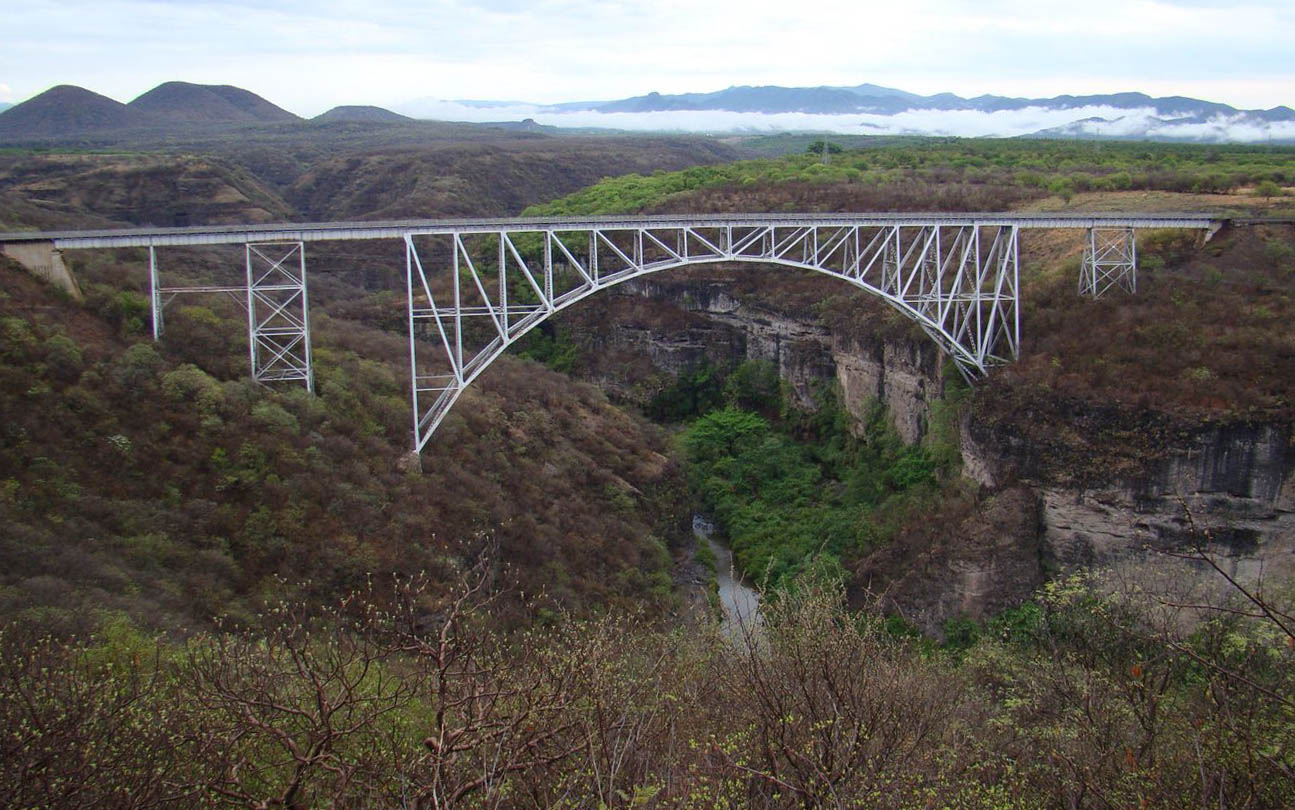
656 feet 200 meters |
1985 | Aiko-Tsukui-Gun, Kanagawa | Japan |

|
1249 | Kawashimogawa Bridge 川下川橋 |
(361) feet 110 meters |
469 feet 143 meters |
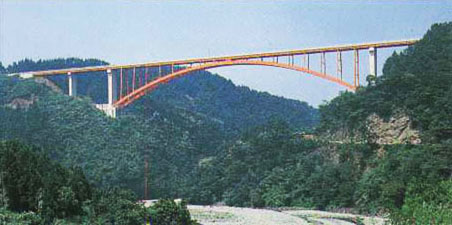
2016 | Sanda, Hyogo | Japan |
|
1250 | Yatsugatake Kogen Bridge 八ヶ岳高原大橋 |
(361) feet 110 meters |
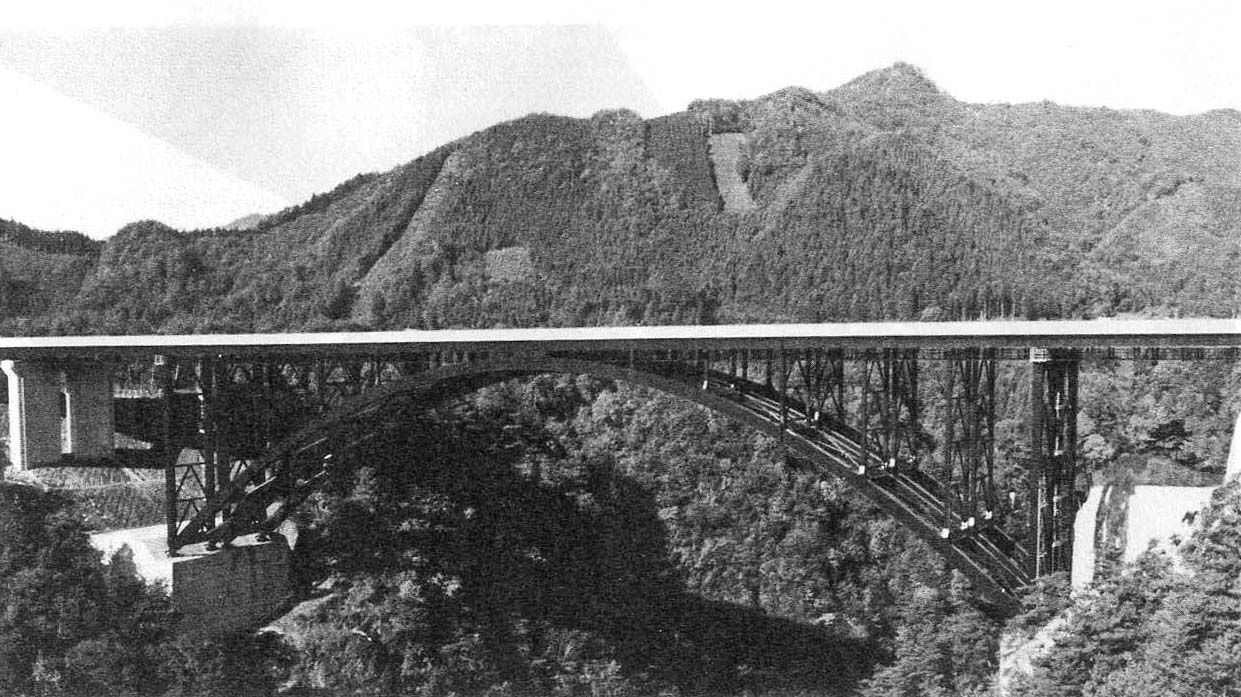
591 feet 180 meters |
1971 | Hokuto, Yamanashi | Japan |
|
1251 | Colle Isarco Viaduct Viadotto Colle Isarco Gossensass Bridge Viadotto Gossensass |
361 feet 110 meters |
535 feet 163 meters |
1969 | Colle Isarco, Trentino-Alto Adige | Italy |
|
1252 | Farma Viaduct Viadotto Farma Petriolo Viaduct Viadotto Petriolo |
(361) feet 110 meters |
(182) feet 55 meters |
1971-2017 | Bagni di Petriolo, Tuscany | Italy |
|
1253 | New Farma Viaduct Nuovo Viadotto Farma New Petriolo Viaduct Nuovo Viadotto Petriolo |
(361) feet 110 meters |
374 feet 114 meters |
2017 | Bagni di Petriolo, Tuscany | Italy |
1-100 | 101-200 | 201-300 | 301-400 | 401-500 | 501-600 | 601-700 | 701-800 | 801-900 | 901-1000
1001-1100 | 1101-1200 | 1201-1300 | 1301-1400 | 1401-1500 | 1501-1600 | 1601-1700 | 1701-1800 | 1801-1900 | 1901-2000
2001-2100 | 2101-2200 | 2201-2300 | 2301-2400 | 2401-2500 | 2501-2600 | 2601-2700 | 2701-2800 | 2801-2900 | 2901-3000
1001-1100 | 1101-1200 | 1201-1300 | 1301-1400 | 1401-1500 | 1501-1600 | 1601-1700 | 1701-1800 | 1801-1900 | 1901-2000
2001-2100 | 2101-2200 | 2201-2300 | 2301-2400 | 2401-2500 | 2501-2600 | 2601-2700 | 2701-2800 | 2801-2900 | 2901-3000